Installation
We suggest to always use the standard setup.exe instead of the MSI package if possible because the standard setup.exe takes care of prerequisites and installs them automatically for the user.
Please download gloCOM 7.6 from our official website www.bicomsystems.com. After the download is finished, click on the icon to start the installation.
The welcome window starts the installation process. Click on the Next button to proceed with the installation or click on the Cancel button to exit the installation wizard.

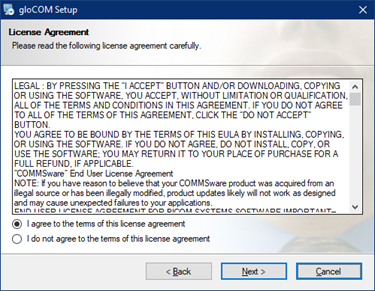
Read the license agreement and select I agree if you accept the License Agreement. Click on the Next button to proceed with the installation or click on the Cancel button to exit the installation wizard.
The Installation Folder window sets the default location where the gloCOM installation will reside. By default C:\Program Files\Bicom Systems\gloCOM is offered. To select a different location, click on the Change button. When done, click on the Next button to proceed with the installation or click on the Cancel button to exit the installation wizard.

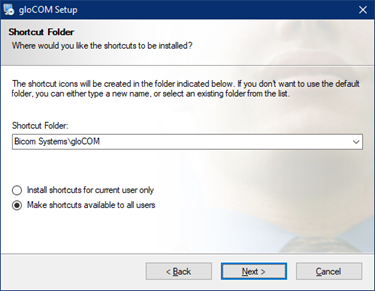
The Shortcut Folder window sets how the gloCOM shortcut will be displayed on the Windows Start menu. Select the preferred shortcut under the Shortcut Folder select box and click on the Next button to proceed with the installation, or click on the Cancel button to exit the installation wizard.
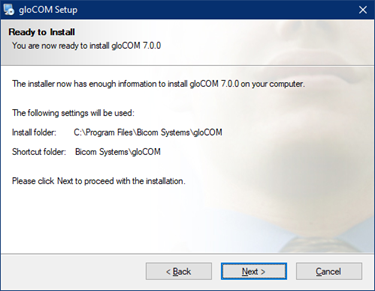
The Ready-to-Install window summarizes the Installation wizard steps and displays all of the selected options. If you agree with these, click on the Next button to proceed with the installation or click on the Cancel button to exit the installation wizard.
The Installing gloCOM window shows the installation in progress.

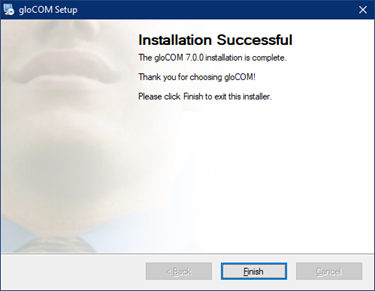
After this step, you'll see the Installation Successful window. Click on the Finish button to close the window and finish the installation.
MSI package Installation
In order to install gloCOM from an MSI package, the following are the prerequisites and must be installed before MSI package :
- Microsoft Visual C++ 2015 Redistributable (X86)
- Microsoft .NET Framework 4 (or above) (optional, if the user wants to use functionalities like Outlook plugin, Skype For Business integration etc...)
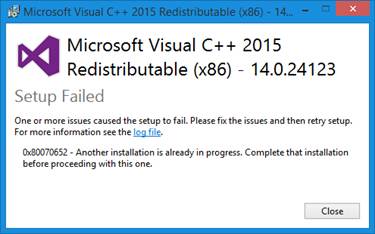
If there is no Visual C++ installed users might get installation errors.
IMPORTANT: Windows Terminal Server installation
MSIX package Installation
MSIX is a modern way to install desktop apps on Windows.
The MSIX installer is very different from the exe and MSI installers. It does not allow users to choose the installation location, virtualizes registry writes, and any modifications to the installed directory.
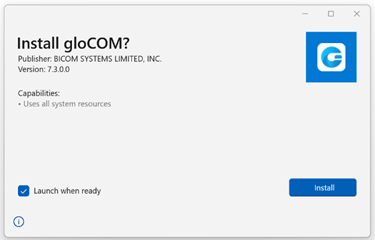
The installed application can be found within the All apps list.
For more information, please visit MSIX package.
Configuring gloCOM
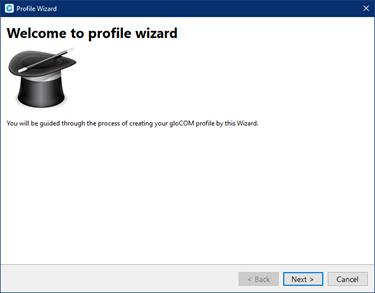
After installation, the user needs to configure the gloCOM Desktop application. Click on the gloCOM Desktop application icon, and the Profile Wizard window will appear. It will ask the user to create a gloCOM profile in order to use the app.
While creating a profile, users will need to select whether they want to use the Single Sign-On (SSO) or Password login method.
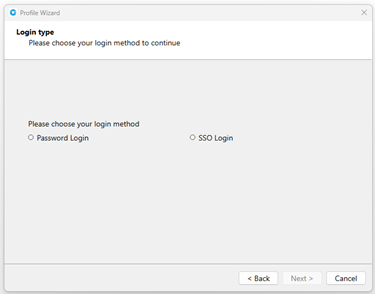
Single Sign-On (SSO) allows users to use one set of credentials to log in to multiple websites and applications.
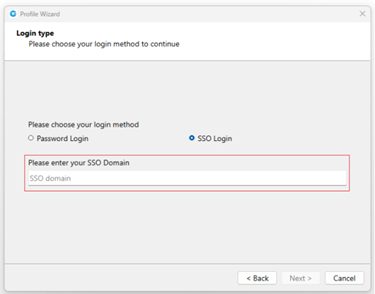
When selecting the SSO Login method, the user needs to provide their SSO domain.
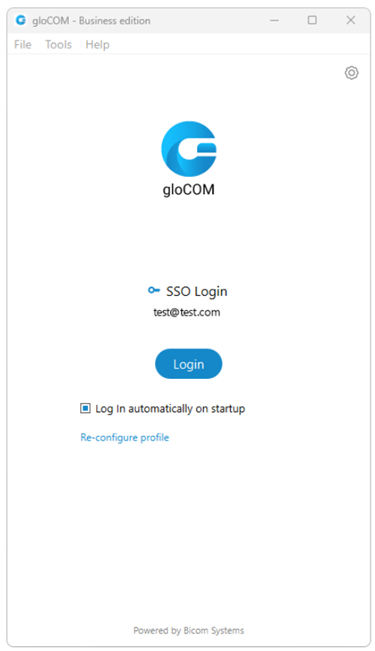
When logging out of the app, users will be asked whether they want to delete the SSO token.
After providing it and clicking the Next button, they will be asked whether they want to use their Google or Microsoft account in order to use the SSO Login method.

Please note that the Single Sign-On (SSO) feature needs to be enabled in a license and configured on the PBXware before it can be used.
However, if they decide to use the Password Login method, they need to use their email and password to access the app.
Nevertheless, the SSO Login method can still be configured by clicking the SSO Login link on the login screen.
1. Account details
Make sure you have received your account details from your system administrator or account manager.
The received details must include:
Account
- E-mail: for example [email protected]
- User password: for example 93sU2e_2%

Advanced
- Server address: The user can enter the DNS domain or the server address (for example: voip.test.com or 134.23.211.23). In the case of the DNS domain, the application will perform a DNS SRV lookup, and it will try to connect to each server that the application obtains based on their priorities. In the case of the server address, the application will try to connect directly to the given address.
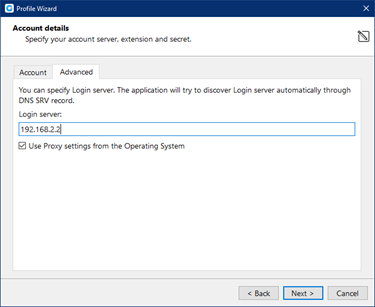
Your administrator can set up a DNS domain for SRV lookup on the server-side. SIP registration will be done for all obtained records, and the first one that succeeds will be in use. This way, failover can be performed for scenarios with more than one SBC. In that case, if the primary SBC goes down, the second one will be in use. (Not supported in Offfice Edition)
From gloCOM 6.0, instead of an extension and secret, users will provide their e-mail assocciated with extension and User password.
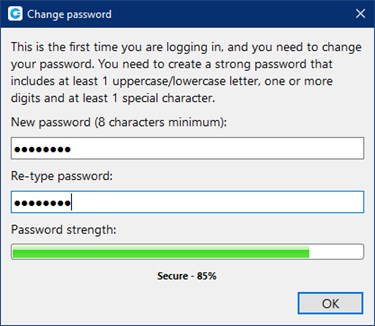
After you click Next, gloCOM will try to connect to the specified server with the user's account details. If the account details are wrong, a red warning will appear. Otherwise, a Change Password pop-up window will appear telling you to change your password since this is the first time you are logging in. Your password has to be at least 8 characters and 85% secure. Users are required to change this password on login and once changed it is hashed and unknown to all administrators of the system.
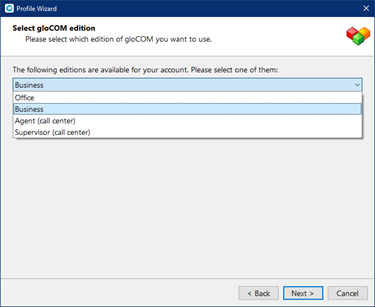
2. gloCOM edition
Select gloCOM edition. You may choose between Office, Business, Agent (Call Center), or Supervisor (Call Center).
3. Setup office and mobile phone
Setup your Office phones. If you choose softphone, you will be able to place and receive calls using your computer. If you choose desk phone, you can control calls on your IP desk phone from your computer. Selecting the checkboxes for both desk phone and softphone will allow users to switch between devices when initiating a call and also to pick which device they would like to answer incoming calls on.
Softphone is not supported in the Office Edition.
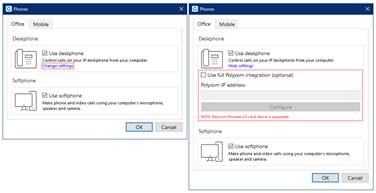
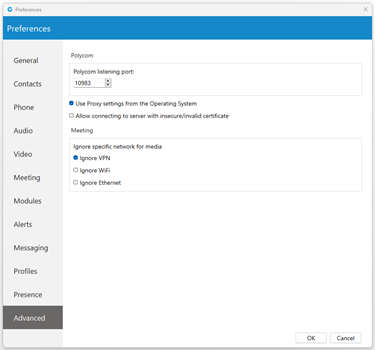
If you use Polycom phones, click on Change settings. Provide the phone's IP address and click Configure. This will help gloCOM to identify and configure Polycom phones.
In gloCOM, users can assign Mobile Numbers that they would like to receive calls on when not at their desk. Click the Mobile tab and click + icon to add Mobile phone number and it’s label.
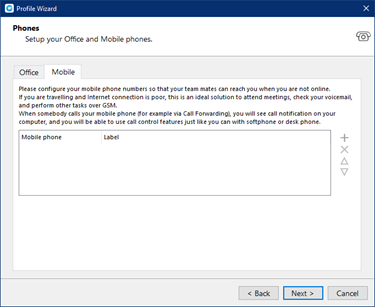
The entered Mobile phone number can be with or without the plus(+) sign.
Click the Next button and a configuration summary window will appear. Please check the profile details and make sure they are correct.

Click the Finish button and you will be automatically logged in with your account. Now you are ready to use gloCOM with all its features.
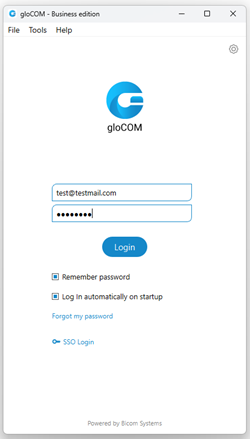
Log In
- E-mail: Provide the e-mail address that is assigned to your extension.
- Password: Enter the password that you created during the gloCOM configuration.
- Remember password Check if you want gloCOM to save your password.
- Log In automatically on startup: When this option is turned on, gloCOM will log in automatically. Every time gloCOM is started, it will automatically log in.
- Forgot my password: If a user forgets their password, they can recover it by following these steps:
- SSO Login: Allows the user to switch to the Single Sign-On (SSO) Login method.
- The user clicks the Forgot my Password on the gloCOM login screen.
- After clicking the link, the user will receive an email indicating that a password recovery has been initiated, along with instructions to click on the link provided in the email.
- Recovery Process:
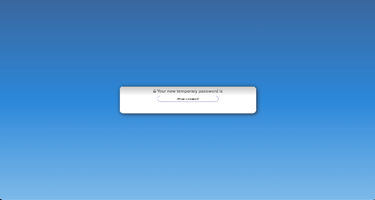
- Once the user clicks the link in the email, they will be redirected to a web page that opens in their default browser. This page will display a panel with the message: "Your new temporary password is:" and a button labeled "Show Password."
- The password recovery link received via email will have a validity of one hour from the time it is sent.
- The user's password will not be reset immediately upon opening the link. Instead, the reset occurs only when the user clicks the Show Password button.
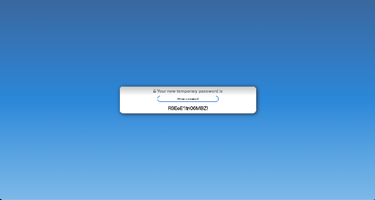
- Once the Show Password button is clicked, the new temporary password will be revealed. The user can then copy this temporary password and use it to log in and set a new permanent password.
Important Notes:
- The password recovery link expires one hour after it is generated. If the link is not used within this timeframe, the user must initiate the password recovery process again.
- It is crucial that the user copies the temporary password immediately after it is revealed, as this will be needed to access their account and create a new password.
Please bear in mind that one can use only one email address associated with a single extension. Using the same email address for multiple extensions is not supported.
- Login Failure message: In case of invalid credentials, a message will appear displaying the following: "Login Failed: Username or Password is Incorrect".
SSL Certificate
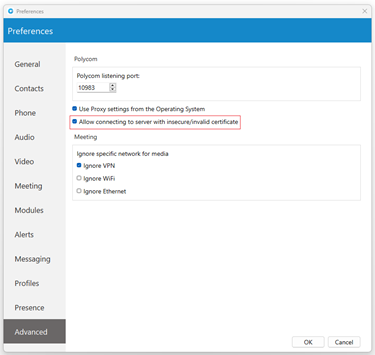
When connecting to the server with an insecure/invalid certificate, a warning message appears asking permission to connect.
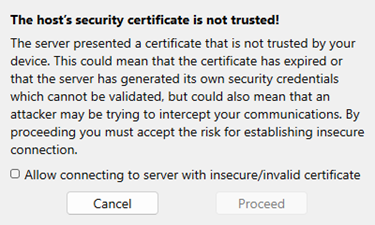
Once permission has been granted, the app will connect, changing the configuration for the server the user was trying to connect to. The app will not ask the user for permission on the next login.
However, this configuration can be modified by navigating to the Preferences -> Advanced section and turning the "Allow connecting to server with insecure/invalid certificate" option off, allowing the application to ask the user for permission on the next login. This option is turned off by default, which means it will not allow insecure connections.
Two-Factor Authentication (2FA) on Login
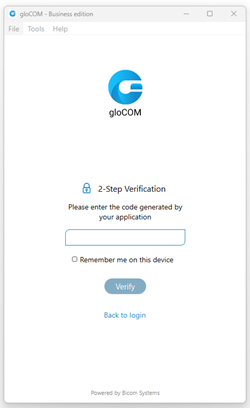
2FA is an additional layer of security used to ensure that users trying to gain access to an online account are who they say they are. First, a user will enter their username and password. Then, instead of immediately gaining access, they will be asked to provide a code generated by the authenticator app to proceed with the login.
To set 2FA up, log in to the app, navigate to Online Self Care, click the 2-Step Verification button, and follow the instructions.
In case the user has not set up 2FA and if 2FA has been enforced on the server side, the following message will be displayed after clicking the Login button: "2-Step Verification needs to be configured on the Online self care to proceed with login. Configure it now.". Otherwise, the user can access the app by entering their username and password.
After setting 2FA up, on the next login, the user will be asked to provide the code generated by the authenticator app in order to proceed with the login. Also, users can check the "Remember me on this device" option, so they do not have to enter the 2FA code every time they try to log in.
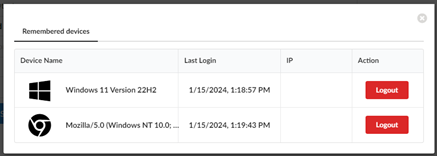
Clicking the Remembered devices button within Online Self Care displays a list of all of the user's currently logged devices. Clicking the Logout button will log the user out of the desired device.
Older versions of the app do not support 2FA.
2FA verification can be reset through Online Self Care. Also, it can be reset by the server administrator.
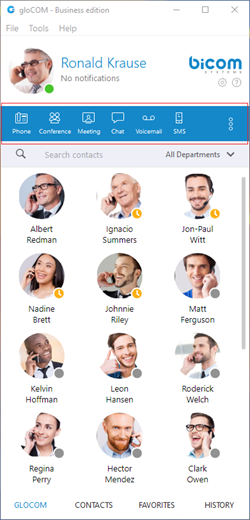
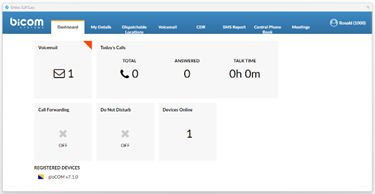
Toolbar
- User image: Represents the user’s profile image that can be changed at any time. Clicking on it brings a Personal Information window. Click the avatar image and select the new image from a computer as a new avatar image. gloCOM now supports higher resolution avatars, allowing users to set up resolution between 256x256 and 512x512 pixels.
- Username: Represents the user name displayed within the application.
- Notifications: Displays any notifications (unread messages, missed calls, pending meeting invites, new voicemails), otherwise displays No notifications.
- Phone: Opens a softphone window next to the gloCOM main window.
- Voice Conference: Opens a Voice conference window next to the gloCOM main window.
- Chat: Opens a Chat window with all user's conversations.
- Voicemail: Opens a Voicemail window next to the gloCOM main window.
- SMS: Opens a SMS window with all user's conversations.
- Fax: Offers the choice to send a fax or view received faxes. Based on the user's choice, an additional window will open next to gloCOM.
- Personal Dialer: Opens a Dialer window next to the gloCOM main window.
To get access to the Fax and My Dialer modules, please contact your Administrator.
- Surveillance Camera: Opens up a Surveillance Camera preview. This option will work only if the user has their surveillance camera set up on the IP address in Tools --> Preferences --> Video --> Surveillance Camera.
- Online Self Care: In order to login to Online Self Care, the user needs to point their browser to: http://$IPADDRESS/ (For Example: http://192.168.1.1/).
- Email: The email address assigned to the extension (ex. The provided email address is used as a username for logging into Online Self Care (e.g. [email protected])) ([a-z] [0-9] [@_.-]).
- Password: Password assigned to the extension ([a-z] [0-9] [@_.-]).
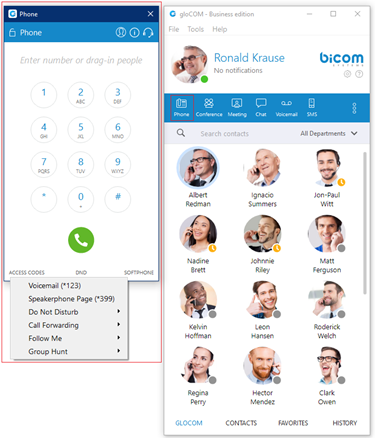
- Parked calls: Once a call is parked, anyone can pick it up by pressing the Pick Call button next to the parked call or dialing the number of the parked extension. On the PBXware, a default parking lot is defined within the Access Codes section. Pressing the Park button during a call will display a drop-down menu that allows the user to select a parking lot.
The user can filter parked calls by checking the option "Show my calls only". This way, they will see only their parked calls within the parked calls window.
- Show Login QR Code: Show Login QR Code as a part of the gloCOM Desktop allows users easier login to their mobile app by scanning QR Code generated by the gloCOM Desktop app.
- Preferences: Opens a Preferences window. Refer to the Preferences chapter for detailed instructions.
- Help: Redirects to our official website: www.bicomsystems.com. Additional documentation and guides are available on our official website www.bicomsystems.com If you still have any questions, please feel free to contact our support department.
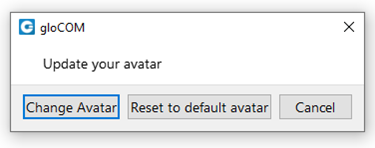
- Reset Profile picture to Default: Allows users to reset their profile picture to the default value (no profile picture). Clicking on the avatar image within the Personal Information dialog opens a pop-up window with the following options: Change Avatar, Reset to default avatar, and Cancel. Clicking the Reset to default avatar option resets the profile image to its default value.
If the user has not set their avatar image, clicking the default avatar image within the Personal Information dialog opens File Explorer (Finder on macOS) window, which allows them to select their avatar image.
If the SMS feature is not included in the license, you will not see the SMS module within the gloCOM toolbar.
System notification provides the user with some important information about the system. For example, the user is using an outdated version of the application. The notification will be shown every time the user logs in to the application. To dismiss the notification, click the Dismiss button.
Personal Dialer
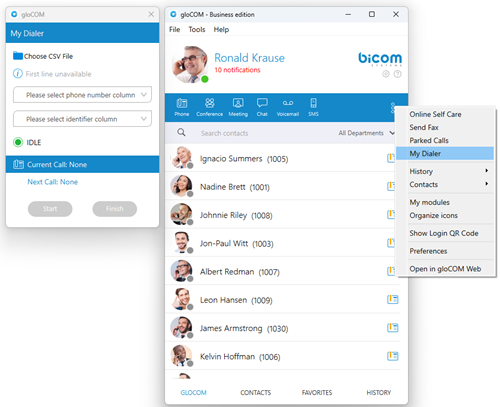
Personal Dialer enables users to load a CSV file inside gloCOM and to dial numbers from that file one after another. This is useful for people who dial the same list of numbers every day, so they don’t have to copy-paste each number. When you open the Personal Dialer module, you are presented with this window:
Personal Dialer is not supported in the Office Edition.
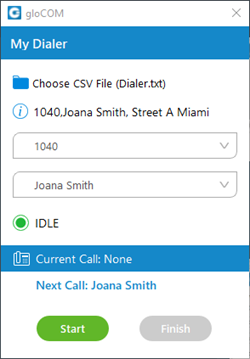
After loading a file first line from the file is shown in the info section, so a user can have a preview of the file structure. Then they have to select the phone number column, so gloCOM knows what to dial. Optionally they can choose an identifier column which is useful for labeling numbers with a name.
For example in the file:
- 101, Joana Smith, Street A Miami
- 102, James Tartos, Street B London
The first column would be a number, and the second would be an identifier (person name, company name, etc.). This identifier is used in the Current Call and Next Call labels so a user can have an idea of who is going to be dialed next. After he presses the Start button gloCOM proceeds to call the first number from the list if there are no other calls at the moment. Numbers are being dialed one after another, but a user can pause the dialer at any time if they want to. Dialing is finished after the end of the list is reached, or if a user finishes dialing.
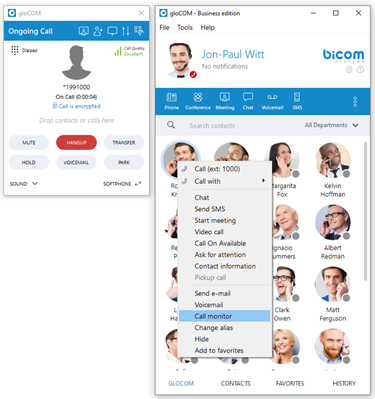
Destinations and gloCOM Modules
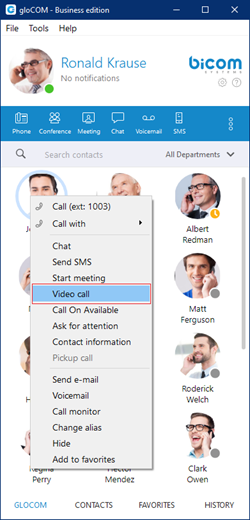
gloCOM can place a call to any system destination, for example: extensions, queues, conferences, voicemail, system calls, or parking. Through PBXware GUI an administrator can hide non-gloCOM extensions so they are not displayed in the user list. Calls can be placed with a drag-and-drop motion from one extension to another, or directly from the phone display to the extension, for example. Right-clicking on a contact name offers more possible actions regarding the selected extension.
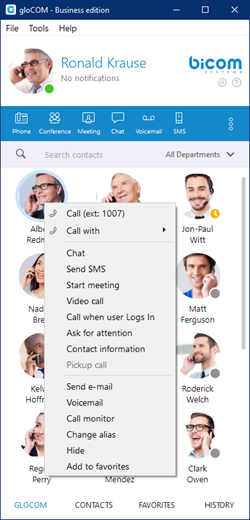
This way the user can:
- Make a call from gloCOM
- Chat with the selected contact
- Start a meeting with the selected contact
- Make a Video Call from gloCOM
- Call the selected contact On Available
- Ask for attention
- See more information about the contact
- Pickup call
- Send an email to a contact
- Leave a Voicemail
- Monitor calls
- Change the contact's alias
- Hide contact
- Add the selected contact to Favorites
Phone
The phone module area where information about possible missed calls is shown.
- From the phone module you can set up an office and mobile phone by clicking the settings icon next to missed calls information.
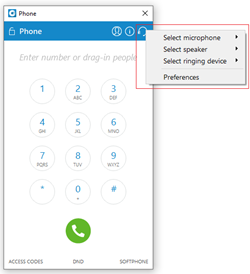
- Select your audio device by clicking the Headset icon. The drop-down menu with the following options will appear:
- Select the microphone device: Allows you to select which device you want to use as an input device.
- Select the speaker device: Allows you to select which device you want to use as an output device.
- Select the ringing device: Allows you to select which device you want to use as a ringtone device.
- Preferences: It points to the Preferences → Phone → Audio devices section where you can also select which input, output, and ringtone device you want to use or to test your audio devices.
Also, you can change your audio device during a live call by clicking the Sound button.
Default ringtones are different for inbound and outbound calls when using a softphone.
- A green (or eventually red) circle shows the Phone module connection status. If green is shown, the Phone module is connected and the user can place calls. If a red circle is shown, the Phone module is not connected and the user is unable to place a call, in which case the user should contact their system administrator.
- In the Phone module, you can see which phone mode is set by default. Click on the dropdown menu, and choose between Softphone, Deskphone, and Mobile App. Next to this dropdown, there is a DND icon with the option to set your status to Do Not Disturb.
- Phone module area where contact is shown after the Drag-and-Drop action.
- Phone module area where a dialed contact's phone number is shown.
- Speaker volume tuner. Adjust the speaker volume by moving the slider up or down. Do not increase volume more than needed because it can induce hearing loss.
- Microphone volume tuner. Adjust the microphone volume by moving the slider up or down.
- Phone module dial keypad. Used for entering phone numbers.
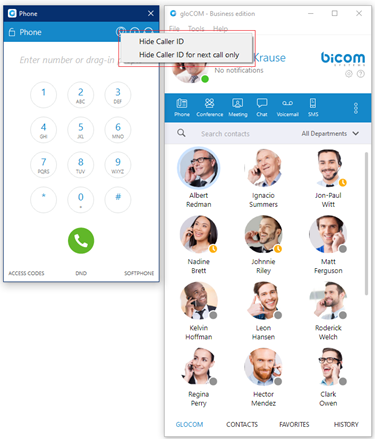
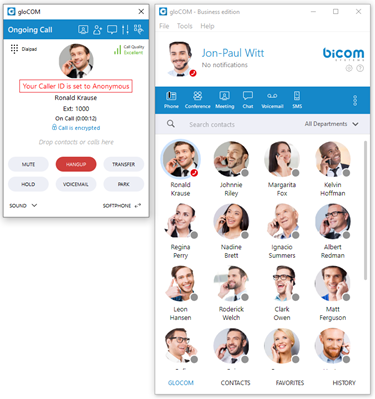
Users are able to block caller ID directly from gloCOM. Two options are available: Hide Caller ID and Hide Caller ID for the next call only.
When a user presses and holds down any key inside the Phone Dialer except 0, it will display the pressed number or sign. However, when the user presses and holds down the 0 key, it will display the + (plus) sign.
Placing Phone Calls
1. Open Phone module
- Click on the Phone module icon to show the Phone module.
2. Dial entering the phone number
- Use the Phone module dial keypad or keys on your keyboard to enter the phone number you want to dial.
- Click on the Dial button to place a call.
1. PCI compliance
The user is on a phone call with an agent, and the caller needs to perform a payment, he needs to say his credit card obviously. Agents turn on an option in gloCOM that will detect DTMF from the caller, and enter them into a text field by simulating keypress with DTMF digit. This way caller does not send credit card by voice, but rather through DTMF, straight into the field on a website for payment. Inside the call window, there is an icon for activating this feature. After activating, DTMF that other side inputs are written wherever your cursor is positioned. You can stop receiving remote DTMF by either pressing the icon again, click on the Stop Remote DTMF button or by ending the call.
2. Show entered DTMF
This feature enables you to see entered DTMF in the call window, so you can make sure you have entered the correct digits.
3. Dial with Drag and Drop
- With your mouse click and hold any contact from the contact list, then drag the selected contact from the gloCOM list to the phone module area, and Release (Drop) the contact.
- Click the Dial button to place a call.
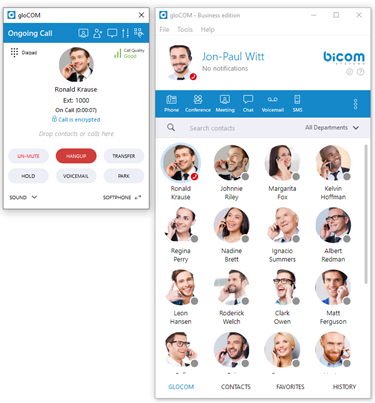
Live call
4. Transfer options:
- Blind/transfer to a phone number: Type in some number (i.e. mobile phone) and transfer the call to it.
- Transfer to another ongoing call: If a user has 2 or more active calls, he can transfer the calls from one to another.
- Transfer a call using drag and drop: Users can transfer an ongoing call by dropping it onto the desired contact inside the contact list within the main gloCOM window. While dragging, a transfer indicator will be displayed. The call can be transferred using the Blind and Supervised transfer options, or it can be transferred directly to the contact's Voicemail. Transfer using the drag-and-drop option does not apply to conference calls.
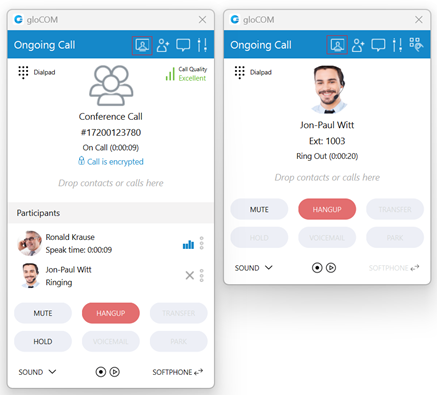
One simple scenario is:
A gloCOM user is talking to John Doe. He receives a call from Allison Smith while speaking to John Doe. The gloCOM user is now able to add Allison Smith to the existing call with John Doe and all 3 participants will now hear each other.
When trying to transfer a call via gloCOM, when choosing a contact from your list you can now see the google and outlook contacts in a dropdown list. Also, users can press enter to confirm the transfer.
5. Call encryption
During an ongoing call, there is an indicator that shows call encryption if a call is encrypted. Call encryption settings are configured on the server by default, but the user can override them within the gloCOM app by going to Preferences → Phone → Advanced.
There is a checkbox that indicates the use of the default encryption set by the PBX. By unchecking it, the user can change options between TCP, UDP, and TLS. The user is required to log out and log in after changing these options.
The indicator should only be present when the TLS encryption is enabled and if the softphone is in use (in all other cases, the indicator will not be displayed). Clicking it will bring up a pop-up message explaining the encryption.
6. Echo Cancellation
Echo Cancellation as a part of the gloCOM Desktop app is a method used to improve voice quality by preventing an echo from being created or removing it after it is already present.
The time required for Echo Cancellation to start removing echo is up to 10 seconds. It is important to note that the Echo Cancellation only works for softphones.
7. Switch phone
During a live call, you can use the Switch Phone button to initiate ringing across all registered devices or a specific device (softphone, desk phone, and mobile app), so the user can continue the call on another device. A perfect example would be switching from your desk phone to your mobile when you need to leave your office but would like to continue your call. The same applies to conference calls.
Switch phone is not supported in the Office Edition.
8. Copy number from an active call
Copying a number during a call can be done by selecting it and pressing the CTRL+C keys on the keyboard or clicking on it.
The following tooltip message will be displayed while hovering over the number: "Click the number to copy it."
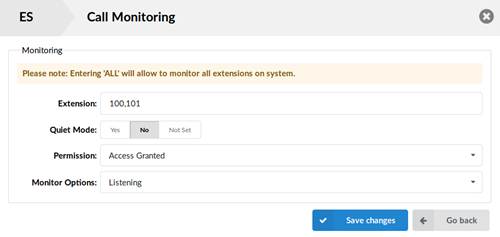
9. Call Monitor
If your administrator enables Call Monitor on your extension in PBXware Enhanced Services, you will be able to listen to any call-in in real-time. When a call is placed, right-click on the user that is on call and choose Call Monitor. You can escalate from silent monitoring to barging in to speaking with all parties.
gloCOM brings a unified call history between Desktop, Web and Mobile applications. Call history is stored for up to a month on the server and synced between all user devices. It means that the user will be up to date with their recent calls all the time. The application makes sure that the user’s call history is synced on every login and that they have recent calls available on their device.
Call Quality Metrics
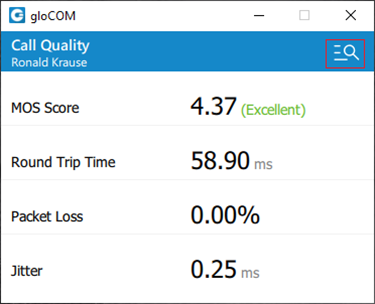
Call Quality Metrics provides the user with details about the call and network quality during a call.
These details include information like:
- MOS Score
- Round Trip Time
- Packet Loss
- Jitter
For example, if the quality of a call is Excellent, there is no problem with the connection, there is little latency, and there is no packet loss. Otherwise, there are some problems with connection, latency, and packet loss.
In a word, it helps with troubleshooting potential network issues during a call.
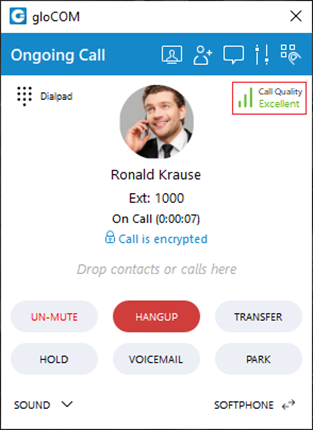
During a call, a Call Quality indicator will appear in the upper right corner of the call window, giving rough information about the call and network quality. The Call Quality window will appear by clicking on it, providing more detailed information about MOS Score, Round Trip Time, Packet Loss, and Jitter.
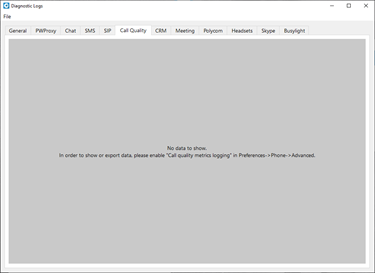
To export this information, click on the Open call quality diagnostic logs. By default, this option is disabled, and to enable it, please navigate to Preferences -> Phone -> Advanced and check the Enable call quality metrics logging.

After enabling it, under the Call Quality tab within the Diagnostic Logs, the user will be presented with the Call Quality information for the last 50 calls. To export the Call Quality information, the user needs first to select the call from the drop-down menu for which they want to create a report and click on the Export call quality report button.

Call Quality Metrics is not supported in the Office Edition.
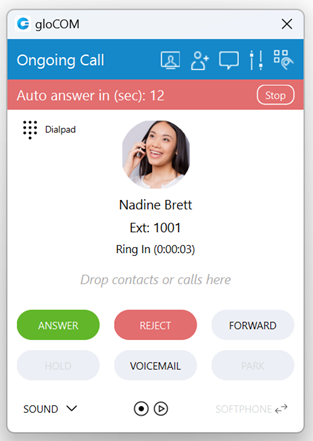
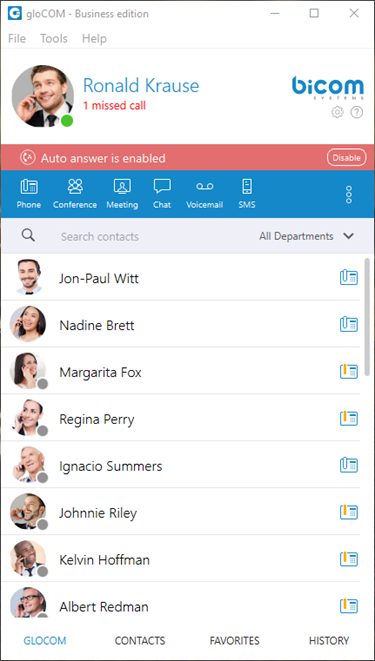
Auto Answer
Auto Answer, as a feature, allows users to answer incoming calls automatically without using the answer button.
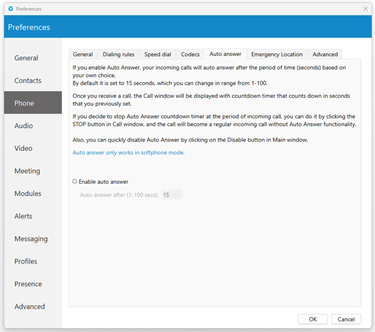
To turn on this feature, please navigate to Preferences -> Phone -> Auto Answer section and check the Enable auto answer option. By default, this option is disabled.
If the Auto Answer option is enabled, incoming calls will be automatically answered after a certain period of time (seconds) based on the settings within the application.
By default, it is set to 15 seconds, which can be changed in a range between 1 to 100 seconds.
Once the call is received, the call window will be displayed with a countdown timer that counts down in seconds previously set by the user.
In case of another incoming call, an Auto Answer functionality will not be triggered while there is already an active call. Instead, it will wait until the active call ends.
By clicking the Stop button, the Auto Answer countdown timer within the call window will be stopped. The call becomes a regular incoming call without Auto Answer functionality.
To disable the Auto Answer functionality, the user can click the Disable button in the main gloCOM window. Additionally, the user can navigate to the Preferences -> Phone -> Auto Answer section and uncheck the Enable auto answer option.
Auto Answer only works in softphone mode.
Voice Conference
- Plus sign used to invite a contact using his landline or mobile number.
- Select a box to choose from a conference room
.
- The Voice Conference module area where contact is shown after Drag-and-Drop.
- To remove a contact from a list, click
.
- Click on the Start button to start the Voice Conference.
- Click on Close to close the Voice Conference.
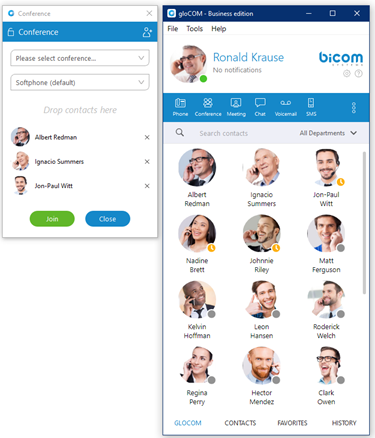
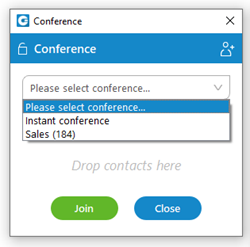
Conference can be created from the dropdown list, and Instant and Predefined conferences can be selected.
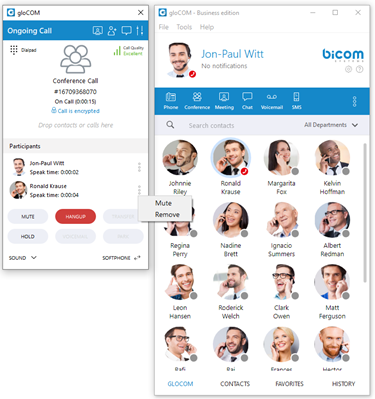
- Instant conferences: User can create a conference by adding one or more people to an ongoing call. With this option, you can add extensions or any number available from your contact list. If you missed the conference call, you are still able to join the conference from the Call History tab provided that a conference still exists. There are two ways to do that: double-click on the conference number or right-click on the conference number and then choose a call or call with.
- Predefined conferences: Users can join predefined conference rooms and add other participants.
Parked calls can be added to the conference either by using drag-and-drop or by accessing the Add to conference window, selecting the Parked call option from the drop-down menu, choosing the desired call from the drop-down list, and clicking the OK button.
Presence
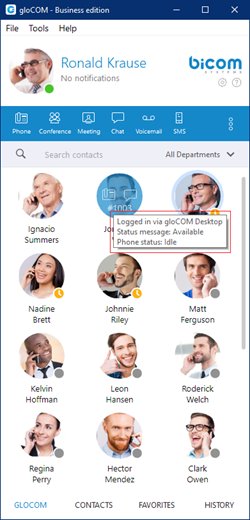
gloCOM brings a unified presence that is synced across all of your devices (Desktop, Mobile, and Web). For a currently online user, you can see if they are connected via Desktop, via Mobile, via Web, or even all three. For users who are not currently connected, you can see when was their last activity, in order to have a better understanding of their availability. For example, if you see that the user was last seen a few minutes ago, you might assume they will probably be able to respond to your calls/messages. On the other hand, if a user has not been seen for a few days, it might indicate they have limited availability and are out of the office. User’s presence and availability are represented by the icon visible in the bottom right of their avatar. Details about a user’s presence are shown in a tooltip after hovering over them in both grid and list view. The tooltip contains information such as: the device that the user is connected with, their last activity, their status message, and their phone status (idle, on-call, do not disturb, etc.).
Status icon indicator can be any of the following:
If there is no icon in the bottom right of the user’s avatar, it means that they are currently online and available.
This icon defines the "Ringing" status of the extensions. It will be displayed when the user is being called, except when the user is already on a call, in which case the status will be “On Call”.
The user is currently on a phone call.
The user is currently online, and they’ve set their status to Busy.
The user is currently online, and they’ve set their status to Do not Disturb.
This icon has multiple meanings:
- The user is currently online, and they’ve set their status to Away.
- The user is currently connected via Desktop, but they are Away from Desktop.
- The user is not currently connected, but they were last active less than N hours, where the N represents the value that depends on the settings set on the server (For example, 8 hours, 15 minutes, etc.)..
The user was not active in the last N hours, where the N represents the value that depends on the settings set on the server (For example, 8 hours, 15 minutes, etc.).

MS Teams Presence Sync Integration
This integration synchronizes Microsoft Teams' presence status with the Bicom client application (gloCOM Desktop, gloCOM Web, and gloCOM GO) extension’s presence. For example, if users change their presence to "Do Not Disturb" in Microsoft Teams, their presence status in gloCOM will automatically change to "Do Not Disturb" as well.
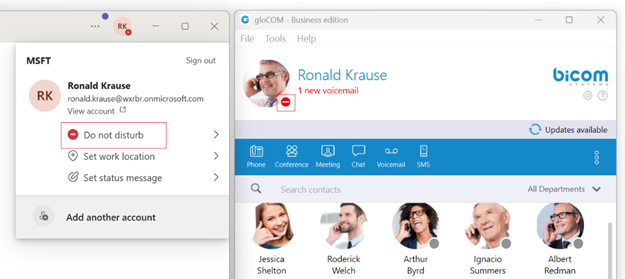
This synchronization only works from Microsoft Teams to gloCOM. It is not bidirectional. Changes made to gloCOM's presence status, such as setting it to "Busy", will not impact the presence status in Microsoft Teams. However, there is an exception that applies only when gloCOM Extension is on a call while Teams' presence is set to "Available" or "Busy".
To use MS Teams Presence Sync integration, it must be configured on PBXware version 7.5 or higher.
Status and status message
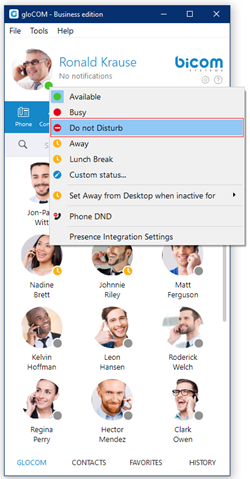
You can choose your own status by clicking on the status icon in the bottom right of your avatar in the main window, or by clicking on the tray icon.
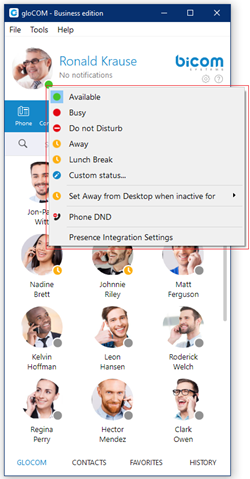
A menu will pop up and you can choose between:
- Available
- Busy
- Do not disturb
- Away
- Any of the statuses defined by the PBXware administrator
- Custom status
PBXware administrator can add statuses through PBXware GUI and those will appear as an option in the menu for all users. For example, an administrator could add Lunch Break status so users can easily inform others when they are using their lunch break and are not at their desk.
Also, you can set your own custom status, and write any message to describe your current availability. For example, if you have to attend a meeting, and you are not available to respond to calls or messages, you could choose Custom status… from the menu, select Busy from the dropdown, and type In a meeting as a message. This informs all other users that you are busy and the reason for that is you’re currently attending a meeting. This allows all users to have a better understanding of each others availability since each user can type a custom message to describe their current availability.
After you choose any of the statuses, you also have to specify status expiration. This allows you to let the application revert your status back to Available after a certain period of time. Using the example mentioned above, you could set your status to Lunch Break with the expiration of 1 hour, so when you come back to the office you don’t have to remember to change your status back to Available since the application will automatically do that for you.
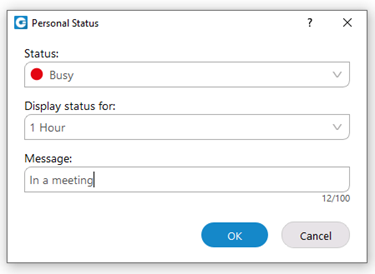
When setting status expiration you can choose between:
- Today
- 1 hour
- 4 hours
- 8 hours
- 12 hours
- 2 days
- 5 days
- This week
- Always
Do not Disturb status
Setting your status to Do not Disturb (including custom Do not Disturb statuses) disables chat notifications, conference join notifications, and notifications informing you that someone has come online via Desktop. This allows you to easily remove distractions during an important period of the day when you need to fully concentrate on the task at hand. Note that this overrides the settings in the Alert section inside of the Preferences window.
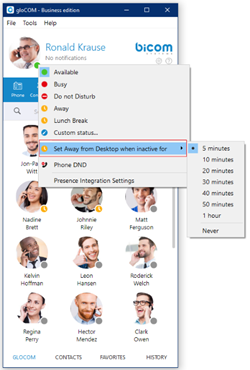
Away from Desktop
When there is no user activity on your computer for a certain period of time gloCOM can inform other users that you are away from your desk. This can be configured by clicking on the status icon next to your avatar in the main window, hovering over the Set away from Desktop when inactive for item and choosing the desired option.
Voicemail
- Select a Voicemail message and click
to delete it. Please note, voicemail delete is permanent.
- Click
to move the selected voicemail message to the old messages directory.
- Click
to place a call to a contact who left a voicemail message.
- Click
to save a voicemail file to the disk.
- Click
to play the selected voicemail message.
- Click
tab to show new voicemail messages.
- Click
tab to show old voicemail messages.
While playing voicemail messages, the waveform shows up for the selected voicemail. It is possible to go back and forth through selected voicemail by clicking on the waveform.
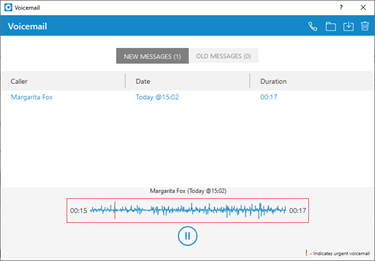
The Extension name and number will be shown within the voicemail window for the internal voicemails. Otherwise, only the number will be shown.
Placing Video Calls
To place a video call, right click on a gloCOM contact and select Video Call from the drop-down menu.
Video call is not supported in the Office Edition.
Sending Fax
Outgoing faxes
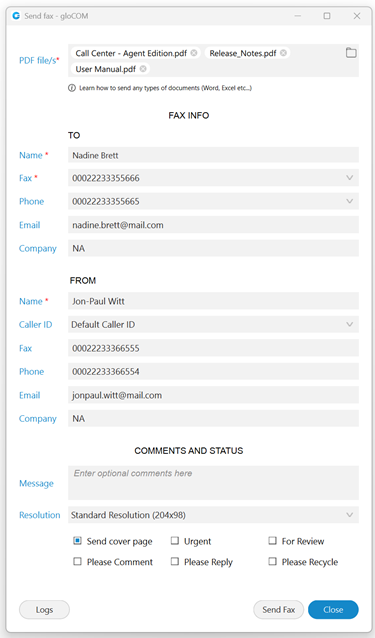
To send a fax, a user needs to navigate to the Send Fax module, fill out the required fields, and select the PDF file(s) they wish to send by clicking the file icon on the right side of the PDF file container. If they need to remove any selected files, they can do so by clicking the 'x' button next to the corresponding file.
- PDF file: Select a PDF file(s) that should be sent.
A user can select up to a maximum of twenty (20) files to send.
If users choose to include a cover page, the details entered in the Send Fax dialog will be displayed on the fax cover page.
Once everything is prepared, click the Send Fax button to transmit the selected files. A resizable progress dialog will appear, displaying all the selected files in the order they were selected. By default, a maximum of five (5) files will be shown at the same time. If there are more than five (5) files, users can scroll through the list to view them.
The files displayed in the dialog will be sent one at a time, starting from the top and proceeding to the bottom. The following file will only be sent after the previous one has finished transmitting. Users will be able to view the progress of each file being sent.
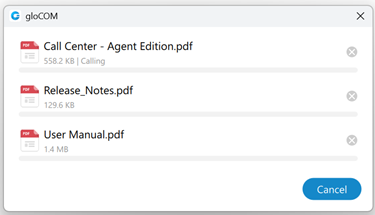
A notification will appear after a file is sent, informing the user of the transmission.
The sending file(s) can be canceled at any time, either individually by clicking the 'x' button next to each file or all at once by clicking the Cancel button.
Closing the progress dialog before sending is complete will prompt a confirmation dialog asking if the user wants to cancel sending all remaining files.
After canceling a file transfer, the 'x' button will change to a Retry button. This allows the user to attempt sending the file again. Clicking the Retry button will move the file to the end of the sending queue, making it the last file to be sent.
After a file has been sent, or if the attempt to send it has failed, a Fax report button will appear instead of the 'x' button. This allows the user to view the fax report for the selected file. If the file was not successfully sent, a Retry button will be available within the fax report dialog, enabling the user to attempt sending the file again.
Once all files have been sent or canceled, the Cancel button changes to a Close button, allowing the user to close the progress dialog. If the user decides to retry a file at this point, the button reverts back to a Cancel button.
TO Section
- Name: Enter the name of the recipient. For example, Tim Barr.
- Fax: Enter the phone number to which you want to send your fax, for example, 02033998800.
- Phone: Enter the phone number of the recipient.
- Email: Enter the recipient's email.
- Company: Enter the recipient's company name.
FROM Section
- Name: This field will be automatically populated with your gloCOM username.
- Caller ID: Caller ID is a drop-down menu with the list of caller IDs allowed for an extension. Caller IDs are added from the PBXware GUI.
- Fax: Enter your fax number.
- Phone: Enter your phone number.
- Email: Enter your email.
- Company: Enter your company's name.
COMMENTS AND STATUS Section
Additional information like comments and status can be entered also.
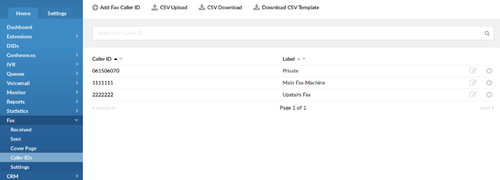
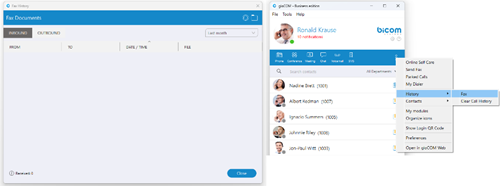
Incoming faxes
- Show list of all received and pending fax documents.
Send fax is not supported in the Office Edition.
Camera
- Surveillance Camera: Opens up a Surveillance Camera preview. This option will work only if you have your surveillance camera set up in the IP address in gloCOM Preferences --> Video --> Surveillance Camera.
Surveillance Camera is not supported in the Office Edition.
Online self care
In order to login to Online Self Care, point your browser to: http://$IPADDRESS/ (For Example: http://192.168.1.1/). When you click on the gloCOM OSC icon, you are automatically directed to your OSC page.
- Email: The email address assigned to the extension (ex. The provided email address is used as a username for logging into Online Self Care (e.g. [email protected])), ([a-z] [0-9] [@_.-]).
- Password/PIN: The user password assigned to the extension (ex. This field accepts your gloCOM password (e.g.n9h*Caq1Icr)), ([0-9]).
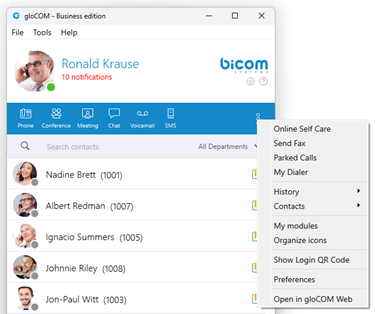
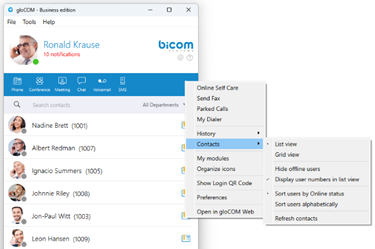
Options (3 dots) menu
Options menu can be accessed by clicking on the 3 dots icon on the far right of the module icons. This menu shows all the remaining modules besides the 6 modules visible in the main window, as well as a few additional options explained below.
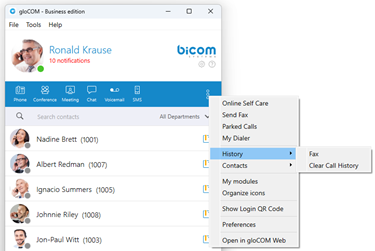
History submenu
- Fax option is used for opening Fax History window which allows you to see all sent and received faxes.
- Clear Call History option is used to clear all your missed, received and dialled calls from the HISTORY tab.
Contacts submenu
- List view option is used to layout gloCOM users in a list.
- Grid view option is used to layout gloCOM users in a grid.
- Hide offline users option is used to hide all users that were not active for 8 hours or more.
- Display user numbers in list view option is used to show a user’s extension number in the parenthesis in the list view.
- Sort users by Online status option is used to sort gloCOM users according to their most recent activity.
- Sort users alphabetically option is used to sort gloCOM users according to the alphabetical order of their names.
- Refresh contacts option is used to sync Outlook (for Microsoft Windows), Address Book (for macOS), Google, CRM, and Central Phone Book contacts.
Other options
- My modules option is used to quickly navigate to Modules section in the Preferences so you could see which modules are available to you, and to set up those modules.
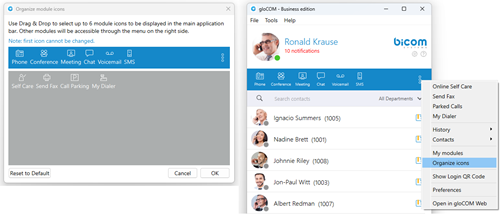
- Organize icons option is used to personalize the module icons available in the main window. Note that the first icon has to be the Phone module, but you can rearrange the 5 other icons as it suits your needs.
- Show Login QR Code as a part of the gloCOM Desktop allows users easier login to their mobile app by scanning QR Code generated by the gloCOM Desktop app.
- Preferences option is used to open the Preferences window.
- Open in gloCOM Web option allows users access to the Web app through the Desktop app by selecting the "Open in gloCOM Web" option from the drop-down menu.
Central Phone Book
Central Phone Book is a centralized list of contacts managed by the PBXware administrator. It is shared across all gloCOM users, and synced together with the rest of your contacts (Google, CRM, etc.). To access your Central Phone Book contacts navigate to the CONTACTS tab, and select CENTRAL PHONE BOOK from the dropdown.
You can use Search contact field to find a contact by their name. Double click on a contact to initiate a phone call. Right-click on a contact to open a context menu with additional options.
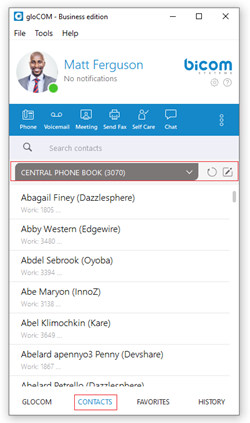
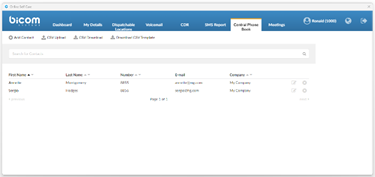
Besides contacts managed by the administrator, each user can manage his own personal list of contacts. This personal list is private and visible only to you. Clicking on the button while in the CONTACTS tab opens up the Online Self Care window and switches to Phone Book tab. Here you can see all of your Personal Phone Book contacts, add new contacts, import/export contacts, or download a CSV template. To remove a contact click on the
button on the right side of each contact.
After you close the Online Self Care window, the application will automatically refresh contacts if necessary, so the modifications you made in the Online Self Care are now synced inside of gloCOM.
Quick List
Quick list buttons enable a quick overview of gloCOM, Contacts, Favorites, and Recent tabs.
- gloCOM: Displays a list of all gloCOM contacts.
- Contacts: Displays a list of all saved and imported contacts.
- Favorites: Displays all contacts that you marked as a favorite.
- History: Displays log of all recent missed, received, and dialed.
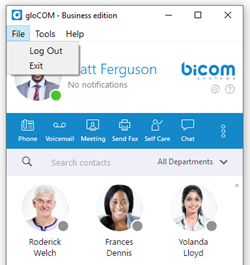
Menu
File Menu
- Log Out: Click on Log Out to log out from active connection(s).
- Exit: Click on Exit button to log out from active connection(s) and close gloCOM application.
Tools Menu
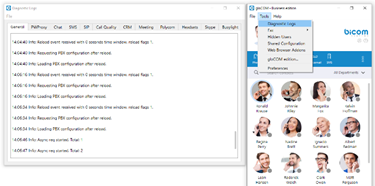
Diagnostic Logs
Here you can see diagnostic logs with the level of verbosity that you have set in Preferences --> General --> Diagnostic Logs.
Fax
- Add Fax Printer Automatically
- Add Fax Printer Manually
- Install Port Monitor
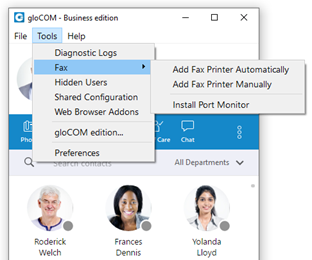
Fax is not supported in the Office Edition.
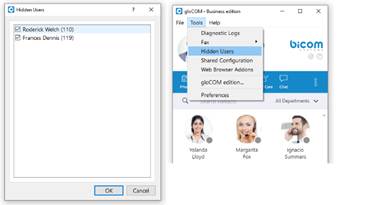
Hidden Users
Opens a dialog showing all your hidden users. Uncheck the box next to a user's name if you want to unhide them.
Shared configuration
Enable:
By enabling shared configuration, all users on this computer will share the same Login account, phone mode, and edition.
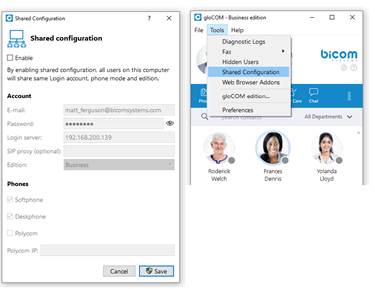
Account:
- E-mail: email address is displayed in this field.
- Password: in case the option Enable is unchecked, the password will be hidden. After you check the Enable option, the option Show Password will be functional.
- Login Server: Shows IP address of server.
- SIP proxy (optional): this field is optional.
- Edition: In this option select edition for your gloCOM. The current edition is displayed, but the possibility to choose between other editions is given.
Phones:
Choose which phones you want to use:
- Softphone: choose to use Softphone.
- Deskphone: choose to use Deskphone.
- Polycom: choose to use Polycom phone.
Polycom IP:
In case the user chose Polycom, in this option user needs to provide the IP address of the Polycom phone.
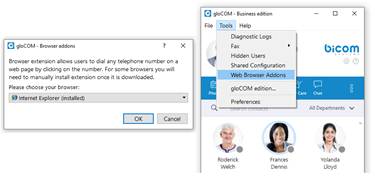
Web browser add-ons...
Click on Download web browser add-ons to add the browser add-on which will allow the user to select and dial a phone number directly from a web page. Supported browsers: Internet Explorer, Firefox, Safari, Edge, and Chrome.
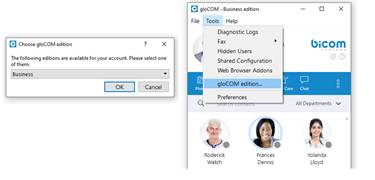
gloCOM edition...
- Change the gloCOM edition.
- Changing gloCOM editions is not possible in case if Shared configuration is enabled.
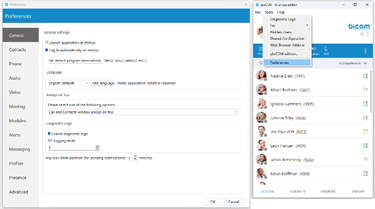
Preferences
Click on Preferences to open gloCOM settings. For more about preferences, please visit the Preferences chapter.
Help
gloCOM Help
- Redirect to our official website [http://www.bicomsystems.com/ www.bicomsystems.com].
- Additional documentation and guides are available on our official website: [http://www.bicomsystems.com/ www.bicomsystems.com]. If you still have any questions, please feel free to contact our support department.
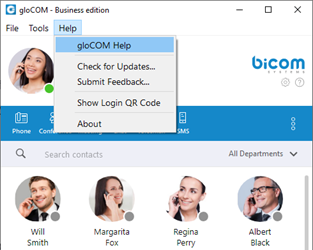
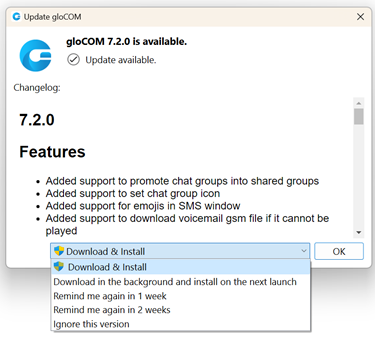
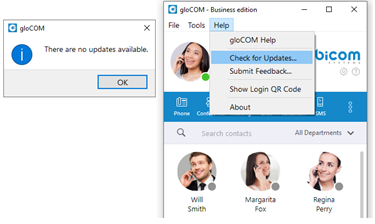
Check for updates
Check online for the official product update.
If available, the gloCOM application will offer the user to select one of the following options:
- Download & Install: This will download and install it immediately.
- Download in the background and install on the next launch: This will download it in the background and force the installation on the next launch.
- Remind me again in 1 week: This will delay the update for one week.
- Remind me again in 2 weeks: This will delay the update for two weeks.
- Ignore this version: This will ignore the currently available update, and the gloCOM application will ask the user to update again when a new version is available.
If the gloCOM application is up to date, the message "There are no updates available" will be displayed, as shown in the picture below.
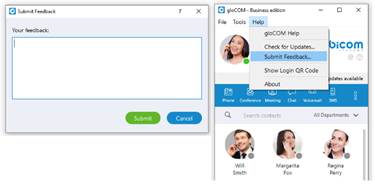
Submit Feedback
- User can now easily send feedback from the Help --> Submit Feedback...
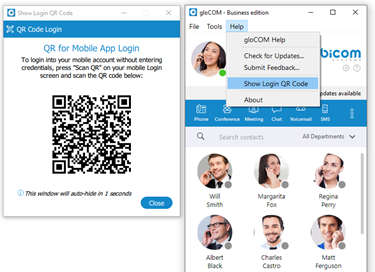
Show Login QR Code
- Show Login QR Code as a part of the gloCOM Desktop allows users easier login to their mobile app by scanning QR Code generated by the gloCOM Desktop app.
- QR Code can be accessed from the Help menu or the three dots menu within the gloCOM Desktop main window.
- Selecting the Show Login QR Code option from one of these menus opens the QR Code window, which will stay open for 15 seconds.
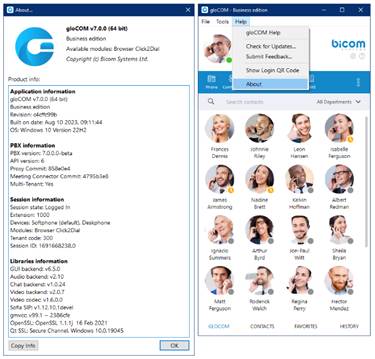
About
- gloCOM About dialog contain information regarding application version, revision, PBX information, libraries, and other important information. Users can easily access/copy and paste info for support if needed.
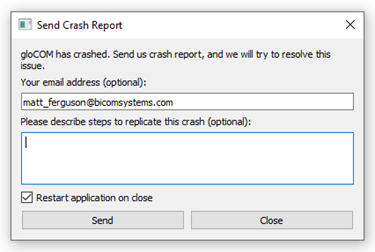
Automatic crash report system.
- When gloCOM crashes, the user has the option to send a crash report for developers to analyze the issue and solve the problem.
Meeting
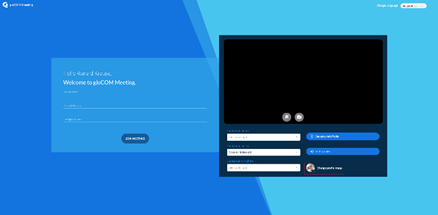
A Meeting module as part of the gloCOM Desktop application allows organizing meetings that support features like audio conferencing, video conferencing, chat, screen-sharing, local recording, and much more. Meetings can be private (only invitees can join) or public (anyone with the number or link can join). Creating meetings within the gloCOM Desktop application requires a meeting license. Otherwise, joining an ongoing meeting can be accomplished by receiving a meeting invitation or joining by meeting number.
Without a license, the user can only join the meeting.
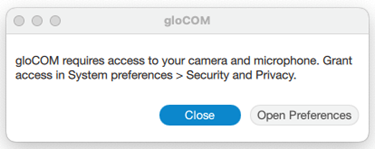
Granting Necessary Permissions (macOS only)
If users are experiencing issues with using the microphone, camera, or screen sharing during a meeting on macOS, they should check their security settings.
The gloCOM Desktop application needs permission for:
- Camera for video communication.
- Microphone for audio communication.
- Screen Recording for screen sharing.
- Accessibility for remote control.
If necessary permissions for the Microphone, Camera, or Screen Sharing have yet to be granted, a pop-up dialogue asking for them will be displayed.
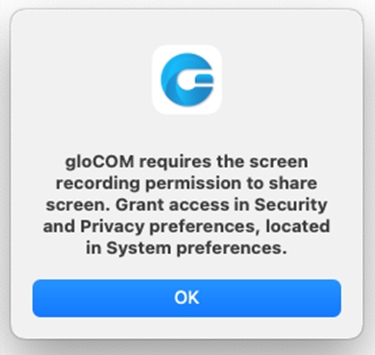
A red exclamation mark will also appear next to the icons in the option bar as a warning that permissions have not been granted.

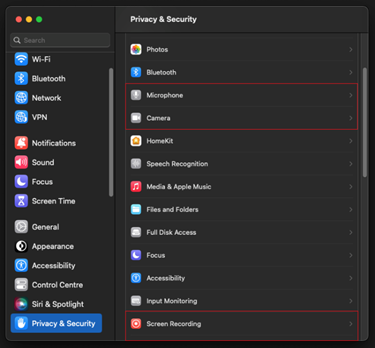
To turn these options on/off, please navigate to System Settings -> Privacy & Security.
Start a Meeting
There are a few ways to start a meeting.
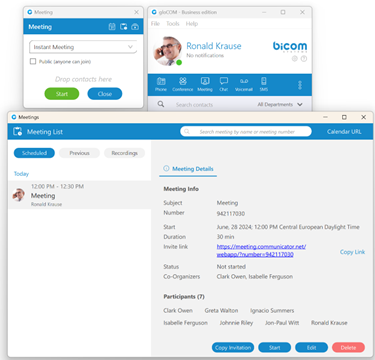
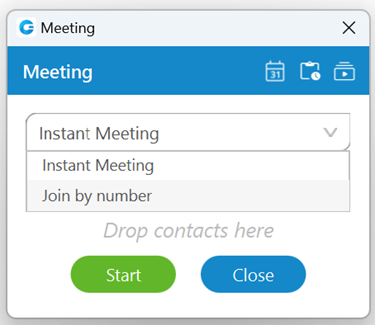
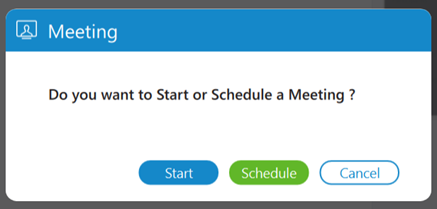
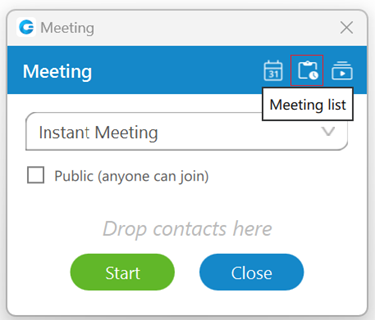
The first way is to click on the Meeting button within the navigation bar. A Meeting window will appear with various options. Through this window, a meeting can be created, scheduled, or joined. Also, meeting and recordings lists can be accessed.
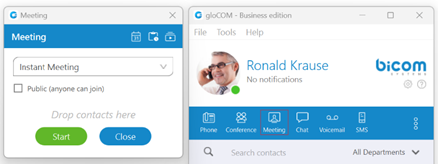
Furthermore, when creating an instant meeting, users can decide whether the meeting should be private (only invitees can join) or public by checking the checkbox next to the "Public (anyone can join)" label.
An instant meeting can be started with or without participants, who can be added after the meeting begins. Participants can be added to the list by dragging contacts from the contact list and dropping them into the participants list within the Meeting window. To remove participants from the participant list click the X button. When everything is ready, click the Start button to start an instant meeting or the Close button to close the window.
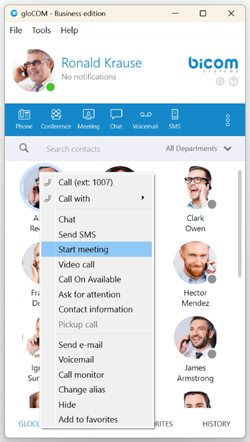
The second way is to right-click on the desired contact within the contact list and select the "Start meeting" option from the drop-down menu, which will start a meeting instantly.
The third way to start or schedule a meeting is through chat conversation, which can be done by clicking the Meeting button within the navigation bar. Both one-to-one and group chat conversations support this ability.
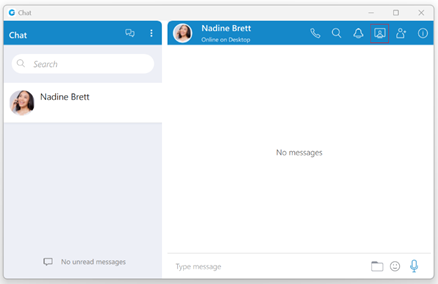
When a meeting is started from the chat conversation, a meeting join link will be automatically sent to the chat. This link can be used to join the meeting quickly via web or mobile application.
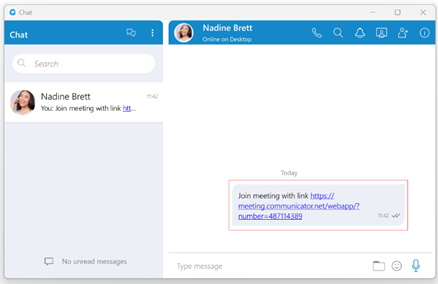
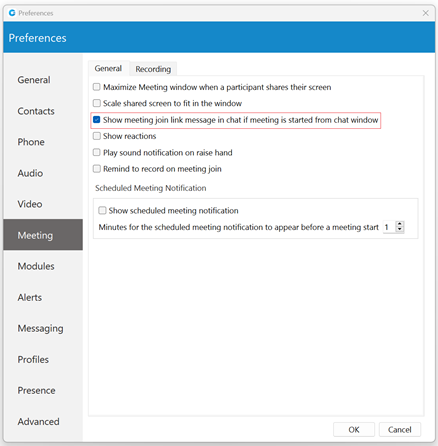
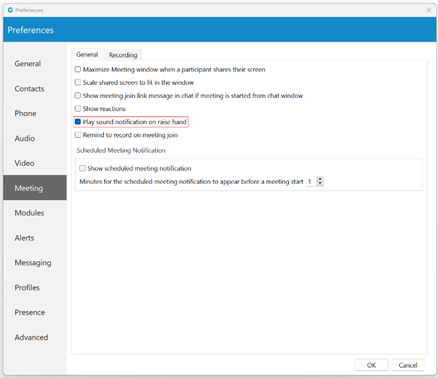
This option is turned on by default. To turn it off, please navigate to Preferences -> Meeting and uncheck the checkbox next to the "Show meeting join link message in chat if meeting is started from chat window" option.
Finally, the fourth way is to start a meeting through an ongoing one-to-one/conference call by clicking the Meeting button within the call/conference window.
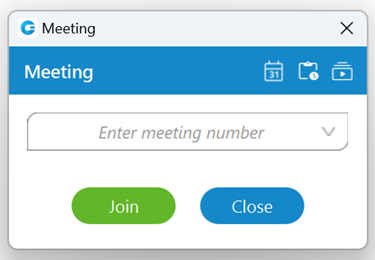
Join by Number
Join by number allows users to join a meeting by entering an existing meeting number. To do so, select the "Join by number" option from the drop-down menu within the Meeting window and enter the meeting number provided by the meeting organizer.
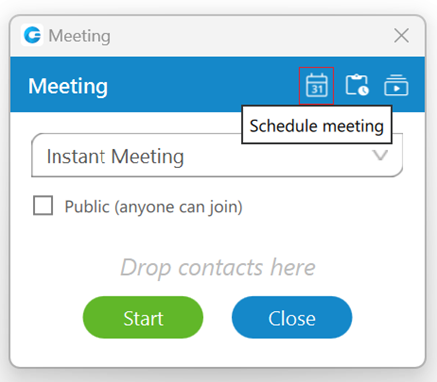
Schedule a Meeting
Schedule a Meeting allows users to arrange a meeting in advance. To do so, click on the Schedule meeting button.
While scheduling a meeting, the following information needs to be provided:
- Subject: Provides information on the given topic for the meeting. (Required)
- Start:
- Date: Provides information on which day a meeting will occur.
- Time: Provides information on the time of day a meeting will occur.
- Duration: Provides information on how long the meeting will be.
- Time Zone: Provides information on the time zone in which a meeting will be scheduled.
- Recurring: Provides information on whether the meeting is recurring or not (If it will repeat, e.g., every Thursday at 3 pm) and how long it will recur (e.g., stop after ten meetings).
- Description: Provides the user to describe a meeting in a few sentences.
- Participants: Provide information on who is supposed to attend the meeting. (The user can add participants by selecting them within the contact/email list on the right side of the window or by entering their email if they are not on the list.)
- Co-Organizers: Provides information on who the co-organizer of the meeting is.
- Public Meeting: Provides users with the ability to decide whether to make a meeting public (anyone can join) or private (only called parties can join).
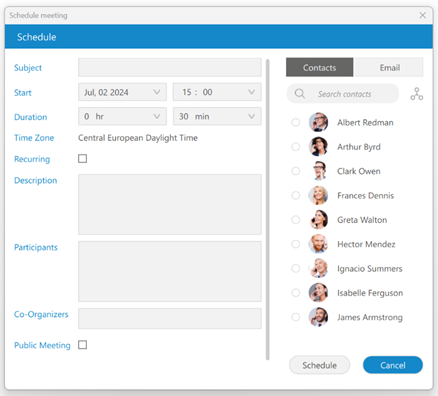
The search field and departments button can be used to filter contacts while scheduling a meeting.
Recurring Meetings
A Recurring meeting is one that repeats every set time (every day, week, or month). For example, every week on Tuesday, you have a sales meeting. Users can edit recurring meetings to suit their needs.

Schedule a Meeting from the Chat
Meetings can be scheduled from the chat. Clicking the Meeting button within the context bar will open a pop-up modal asking users whether they want to start an instant meeting or schedule a meeting with all chat participants.

Clicking the Schedule button within the pop-up window opens the Schedule Meeting window. Note that the participant list is pre-populated with all chat participants, so they do not need to be added manually.
It is also possible to add new ones and remove existing ones.
The meeting subject is also pre-populated with the chat name + Meeting (for example, Sales Meeting). This field is also editable.

When everything is entered and ready for scheduling, a user should press the Schedule button to confirm changes. The meeting will then be added to the Scheduled Meetings list, which can be managed like all scheduled meetings.
Besides the option to Schedule a meeting from the chat, the user is also able to:
- Start an instant meeting with all participants from that chat by pressing the Start button within the pop-up window.
- Choose the Cancel button to close the pop-up modal and cancel starting or scheduling a meeting.
Scheduled Meeting Notification
As the name suggests, Schedule Meeting Notification shows the scheduled meeting notification N minutes before the meeting starts, allowing the user to start the meeting.
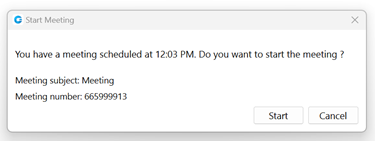
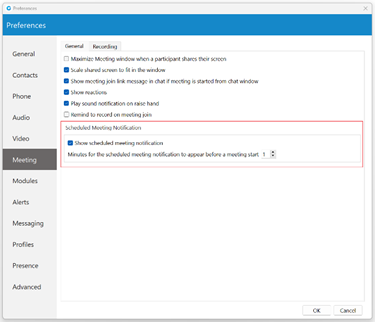
The N represents the value that depends on the settings set within the Preferences -> Meeting tab, within the gloCOM Desktop application (for example, 10 minutes, 2 minutes, 1 minute, etc.). To disable the Schedule Meeting Notifications, please uncheck the checkbox next to the “Show scheduled meeting notification” option. By default, this option is enabled.
Pre-expiry Notification
Pre-expiry notification is a feature designed to automatically notify all meeting participants ten minutes before the end of the maximum meeting duration based on the license/package type. This notification is a gentle reminder that the meeting is approaching its conclusion. If the message is not closed, it will countdown automatically until the end of the meeting. Also, if someone joins the meeting less than ten minutes before the end, they will get a message with the exact time remaining for that meeting.
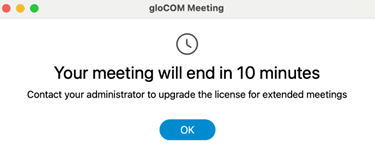
This message pops up in front of all opened windows on your machine, even if the meeting screen on the desktop app is minimized!
Meeting List
To see the list of all ongoing, scheduled, finished meetings, or meeting recordings, please click the Meeting list button within the Meeting window.
Meetings can be searched within this window, and the Calendar URL can be copied and pasted into the user's calendar client.
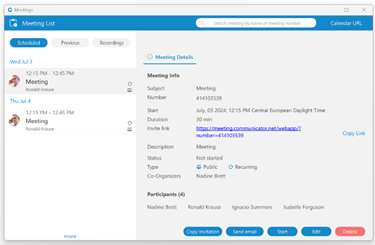
Scheduled Tab
Under the Scheduled tab, scheduled and in-progress meetings can be found. Scheduled meetings are all meetings planned for the future. In-progress meetings are a particular category of meetings that represents all currently active meetings to which the user has been invited.

Meeting Details
The Meeting Details tab with the following information will be displayed for the selected meeting:
- Subject: Provides information on the given topic for the meeting.
- Number: A randomly assigned number associated with an instant or scheduled meeting.
- Start: Start time and the day the meeting will occur.
- Duration: How long the meeting will be.
- Invite link: The link that can be used to join the meeting.
- Description: Provides the user with a short description of the given topic.
- Status: The state of the meeting (e.g., Not started, In progress, Finished).
- Type: Provides information that the meeting is recurring, public, or both.
- Co-Organizers: Provides information on who the co-organizer of the meeting is.
- Participants: Provides information on who is supposed to attend the meeting.
The user can copy the invitation link by pressing the "Copy link" label.
The Meeting Details will be displayed for the selected meeting.
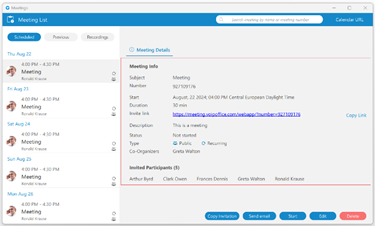
Depending on the meeting type and meeting status, the user will be presented with different button options.
The following list shows the meaning of those buttons:
- Join button: Allows the user to join the ongoing meeting.
- Copy Invitation button: Allows the user to copy a meeting invitation easily.
- Send email button: Allows the user to send an email, which is visible only for public meetings that have not been finished yet.
- Start button: Allows the user to start a scheduled meeting. (Only the meeting organizer and Co-Organizers can start the scheduled meeting.)
- Edit button: Allows the user to edit the scheduled meeting. (Only the meeting organizer and Co-Organizers can edit the scheduled meeting.)
- Delete button: Allows the user to delete the meeting. (Only the meeting organizer and Co-Organizers can delete the meeting.)
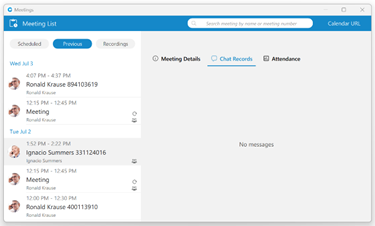
Previous Tab
Under the Previous tab, all finished meetings can be found.
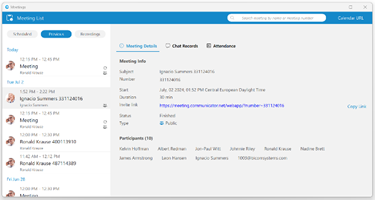
The Meeting Details, Chat Records, and Attendance tabs are available for the selected meeting.
Meeting Details
The Meeting Details tab with the following information will be displayed for the selected meeting:
- Subject: Provides information on the given topic for the meeting.
- Number: A randomly assigned number associated with an instant or scheduled meeting.
- Start: Start time and the day the meeting will occur.
- Duration: How long the meeting will be.
- Invite link: The link that can be used to join the meeting.
- Description: Provides the user with a short description of the given topic.
- Status: The state of the meeting (e.g., Not started, In progress, Finished).
- Type: Provides information that the meeting is recurring, public, or both.
- Co-Organizers: Provides information on who the co-organizer of the meeting is.
- Participants: Provides information on who is supposed to attend the meeting.

The Copy button allows the user to copy meeting. Pressing it will open the Schedule meeting window with copied meeting details.
Only the meeting organizer and Co-Organizers can copy the meeting.
Chat Records
The Chat Records tab displays all chat messages exchanged during the meeting, which can be helpful when something important is shared.
Meeting Attendance Report
The meeting attendance report gives information about the meeting and is available only for finished meetings. To see it, please navigate to the Meeting List window, click on the Previous tab, and select the Attendance tab on the right side of the window.
After selecting it, the following information will be displayed:
- Meeting Name
- Participants
- Start - End Time
- Duration
- Average attendance
- Participants Engagements
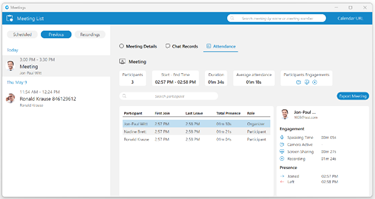
The search field and the Export Meeting button are located below the info section. The search field allows for the filtering of participants, and the Export Meeting button can be used to create a CSV report containing information about the participants' engagement. The report should distinguish between participants who joined via audio-only, video, or both, offering insights into different modes of engagement.
And finally, below the search field is the list of participants who attended the meeting. Selecting one of them will display information about their Engagement and Presence.
Recordings Tab
Under the Recordings tab, all meetings for which recordings can be converted or have already been converted can be found.
The user can access recordings through the Meeting window by pressing the Recordings list icon or the Recordings tab within the Meeting list window.
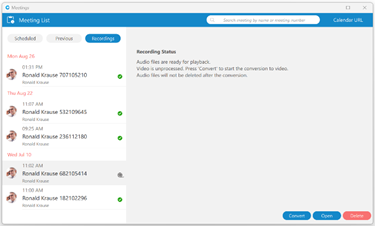
Depending on the recording status, the user will be presented with different button options.
The following list shows the meaning of those buttons:
- Convert button: Allows the user to convert the meeting record so it can be played.
- Play button: Allows the user to play the meeting.
- Open button: Allows the user to open the recording location on the computer.
- Delete button: Allows the user to delete the recording.
Meeting Interface
The meeting interface contains various options that can be used during a meeting.
The meeting interface consists of:
- Meeting Layout: Allows users to change the participants' layout during a meeting by clicking on the Speaker/Grid layout button at the bottom right corner of the layout.
- Record: Records audio, video, chat history, and screen sharing on a computer.
- Mute/Unmute: Allows users to mute/unmute their microphone.
- Video: Allows users to turn on/off their camera.
- Participants: Allows users to see the list of participants and invite new ones. If someone is missing, they can be re-invited. A new invite message to join the meeting will be sent to the invitees.
- Share Screen: Allows users to share their screen.
- Raise Hand: Allows users to raise their hands.
- Reactions: Allows users to send reactions.
- Chat: Open the chat window. The meeting window will expand with the chat on the right, where users can exchange messages during a meeting..
- End/Leave Meeting: Allows users to end/ leave a meeting. Only the organizer and co-organizer can end a meeting.
- Options: Shows additional options for screen sharing, video, participants, and the meeting.
Meeting Layout
Users are able to change the participants' layout during a meeting by clicking on the Speaker/Grid layout button at the bottom right corner of the layout. They can switch between the Speaker and Grid layouts. The Speaker layout focuses on one video stream, either the person currently speaking or the one the user pins. It is also a default view when a screen-sharing session is active.
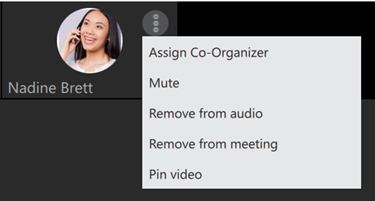
The three dots button in the upper right corner of the participant's video contains the following options:
- Assign/Remove Co-organizer: Allows an organizer and co-organizer to assign other participants as co-organizers. (Only the meeting organizer can remove co-organizer privileges.)
- Mute: Allows an organizer and co-organizer to mute other participants.
- Remove from audio: Allows an organizer and co-organizer to remove other participants from audio.
- Remove from meeting: Allows an organizer and co-organizer to remove other participants from the meeting.
- Pin/Unpin video: Allows users to pin/unpin the participant's video. It sets their video as the main video on display for the viewer.
The Grid layout shows participants in the grid and automatically changes the number of video streams based on the number of participants.
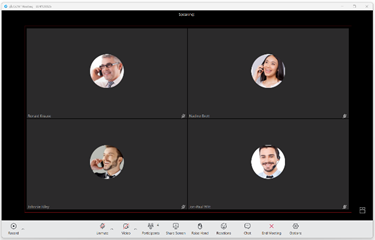
It follows the following conditions:
- Up to 45 participants = grid size 12 (user + 11)
- 46 - 60 participants = grid size 9 (user + 8)
- Over 60 participants = grid size 6 (user + 5)
Participants will be sorted to have those who spoke last be among the first video streams.
The Meeting is now able to run 100 active video participants in one meeting.
Meeting Recordings
The Meeting Recordings feature allows audio, video, chat history, and screen sharing to be recorded during meetings. While recording, the application stores the necessary information on a computer to generate a recording after the meeting ends. This way, the meeting can be held without fear that the converting process will interfere with the ongoing meeting.
To start recording, click the Record button in the far left corner of the toolbar at the bottom of the window.
Once clicked, the button will change its look. Two buttons, Pause and Stop, will appear, allowing users to pause and stop recording. To record their audio, users must use the option "Join by computer" otherwise, it will not be recorded.
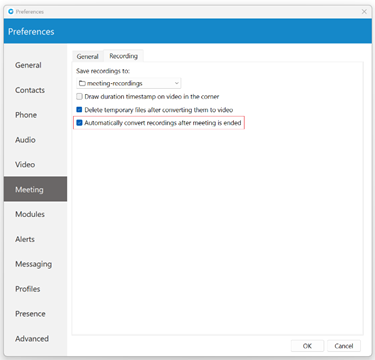
The arrow next to the Record button lets users choose whether to record all services or just audio. Selecting the "Recording settings" option will open options related to recordings. Here, users can choose where to save their recordings. They can also decide whether to draw the duration timestamp on video, delete temporary files after converting them to video, or automatically convert recordings after the meeting ends.

Converting recordings requires significant computer resources.
Generated recordings can be found under the Recordings tab within the Meeting List window. After navigating to the Recordings tab and selecting the desired meeting from the list, the Recording Status will be displayed on the right side of the window. Depending on the recording status, the user will be presented with different button options.

The following list shows the meaning of those buttons:
- Convert button: Allows the user to convert the meeting record so it can be played.
- Play button: Allows the user to play the meeting.
- Open button: Allows the user to open the recording location on the computer.
- Delete button: Allows the user to delete the recording.
By default, every meeting recording will be converted automatically. To turn off the automatic conversion, please navigate to Preferences -> Meeting -> Recording and uncheck the following option: "Automatically convert recordings after meeting is ended".
Configurable Recording Reminder Option
The Recording reminder feature reminds the user to record an important meeting.
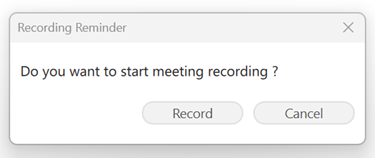
To record a meeting, the user should press the Record button in the pop-up window, and the recording will start. The user should also choose the Cancel button if they do not want to record that meeting.
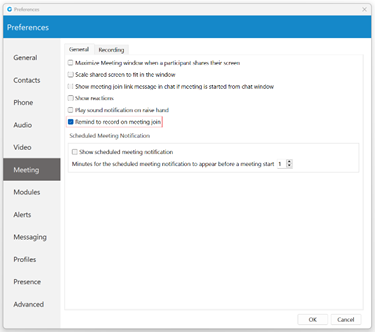
By default, this option is disabled.
To enable this option, please navigate to Preferences -> Meeting -> General and check the checkbox next to the "Remind to record on meeting join" option. When enabled, any time a user creates or joins a meeting, a pop-up window appears asking if the user wants to record the meeting.
Save Chat History in Meeting Recordings
Like audio and video files, chat history is now included in the recording output as a text file since it is an important part of the conference. This file will contain all data, such as links, emojis, text messages, etc, that participants exchange through the meeting chat.
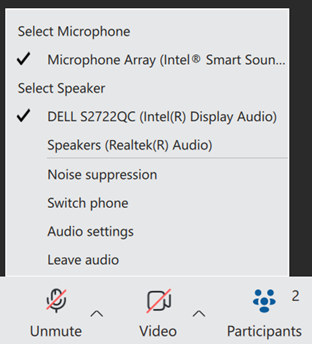
Audio
Here, users can mute/unmute themselves, select a microphone and speaker devices, reduce background noise, switch phones, leave audio, and open audio settings related to audio devices.
In addition, they can mute themselves by pressing the Mute button. If the user is currently muted and attempts to speak, a prompt will appear to inform them that they are muted.
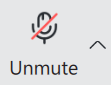
"You are muted" notification will appear when a user attempts to speak while muted.
Video
Here, users can turn on/off their camera, blur their background, choose their virtual background, and open video settings related to the meeting.
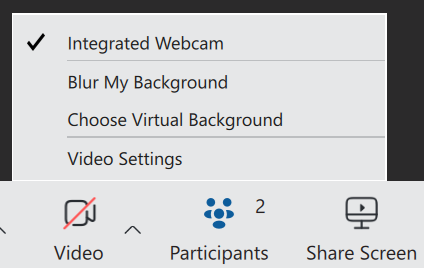
In addition, they can turn on/of their camera by pressing the Video button.

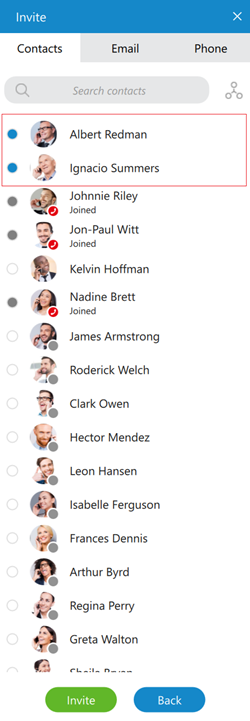
Participants List
Clicking this button displays a list of all meeting participants. Participants can be filtered through this list, and new ones can be invited using a contacts list, email, and phone.
Inviting new participants via phone cannot be done if users have joined their audio by computer.
When selecting new participants is finished, click the Invite button at the bottom of the list to invite them. Clicking the Back button cancels the invitation and displays the participants' list.
Organizers and co-organizers can mute all participants by pressing the Mute All button.
An organizer and co-organizer can assign other participants as co-organizers and mute them. They can also remove other participants from the audio and from the meeting. All this can be done by clicking on the participant within the list and selecting the desired option from the drop-down menu.
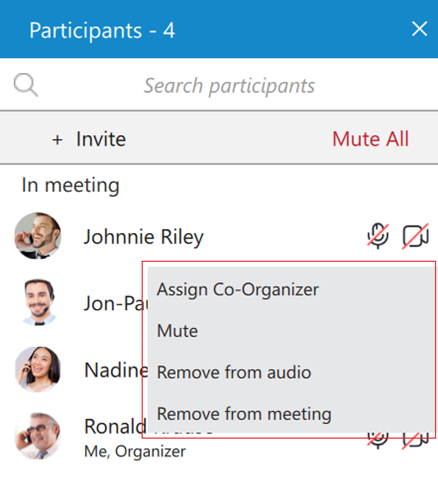
Only a meeting organizer can remove co-organizer privileges.
All participants can mute/unmute themselves and turn on/off their cameras through this list.
Participants can be re-invited to the meeting if they have left it.
Avatars for External Participants
Web and mobile users can now upload their avatar picture, which will be visible to all participants during a meeting.
For external users, uploaded avatars from the web client will be displayed on all other participants' clients (desktop, web, mobile).
An external user refers to any participant who joins the meeting via mobile, web, or a gloCOM desktop client connected to a different PBX.
If the user has the gloCOM extension, the corresponding gloCOM (desktop) user avatar will be displayed for desktop app users, not the uploaded avatar from the web client. However, uploaded avatars from web clients will be displayed for web and mobile participants.
Share Screen
Users can click the Share Screen button to broadcast their screen to the meeting participants.

After clicking the Share Screen button, several screen-sharing options will be displayed.
Options are as follows:
- Whole screen: Share everything on the screen.
- Select a window: Only the selected window will be shared. (e.g., Google Chrome)
Once the desired area has been selected, click on the Share screen button to start screen sharing. When the screen sharing is started, the context bar with the previously mentioned options will appear.

Besides the options mentioned before, users have the ability to:
- Start a New Share: This option allows users to select a new area for screen sharing without stopping active sharing.
- Pause sharing: Momentarily pause screen sharing.
- Stop sharing: Permanently stop screen sharing.
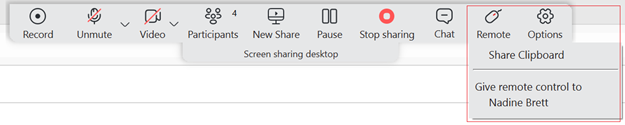
- Remote control: This option allows users to give other participants control of their computer. Once control is given, the other party will be able to use the user's computer as their own, e.g., move the mouse and input from the keyboard. Furthermore, clipboard sharing can also be enabled/disabled, allowing the other side to copy the current clipboard text and paste it on the remote-control host while the remote control is active.
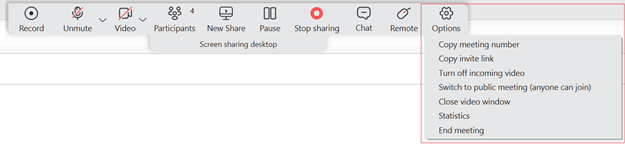
Under Options, the next options can be found as follows:
- Copy meeting number: Copies the meeting number.
- Copy invite link: Copies the invite link.
- Turn off/on incoming videos: Turns off/on incoming videos.
- Switch to public meeting (anyone can join)/Make meeting private: Toggle meeting privacy between regular and private during an ongoing meeting. Only the organizer can toggle the meeting from private to public and public to private.
- Close video window/Show participant's video window: Close/show participant's video window.
- Statistics: Statistics provide the user with details about the network quality during the meeting. The statistics include metrics about Audio, Video, and Screensharing quality. Additionally, users can access the participants list and chat through this window.
- End/Leave meeting: End/Leave meeting can be done by selecting this option.
Clipboard Sharing
To enable this option, a remote control must be activated. Selecting the Share Clipboard option will allow the other side to copy the current clipboard text and paste it on the remote-control host while the remote control is active. The presenter can disable clipboard sharing anytime by selecting the Share Clipboard option again.
The presenter who uses the web application can not give remote control or enable clipboard sharing (to web/desktop users). In other words, it is impossible to take control of someone's computer and access their clipboard if they are in a meeting using the web app.
Only presenters who use the desktop app can turn on/off remote control and clipboard sharing (to web/desktop users).
Video Window
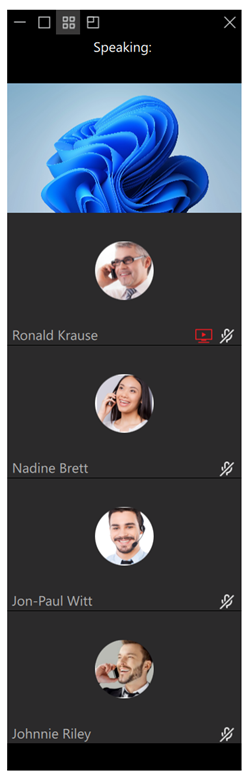
While the screen sharing is active, the video window appears on the presenter's side. It shows the current speaker and allows the presenter to adjust what will be displayed within the window. In addition to displaying the current speaker, the list of participants and the screen-sharing preview can also be displayed by clicking the Show list and Show screen sharing preview buttons in the window's upper left corner, respectively. If the presenter wants to minimize/close this window, they can click the minimize/close button in the window's upper left/right corner, respectively.
Screen Sharing Notifications
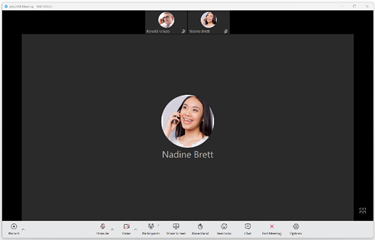
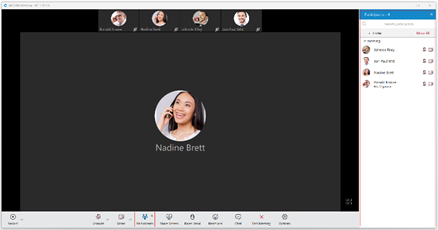
Notification on the Viewer's Side
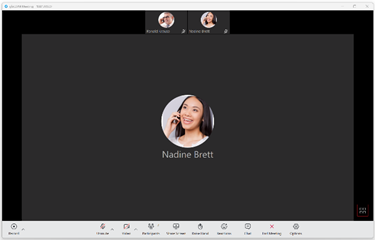
When a presenter starts screen sharing, instead of a black screen on the viewer's side, a message notifying that the screen sharing is about to start (for example, "Nadine Brett has started screen sharing") will be displayed.

Notification on the Presenter's Side
When a presenter starts screen sharing, a notification message "Participants can now see your shared screen" pops up, notifying the presenter that others can see their shared screen. This way, the presenter knows if other participants can see their screen without asking them.

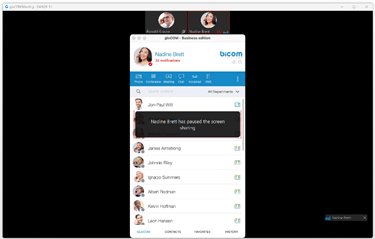
Screen-sharing Pause Notification
A screen-sharing pause notification will be displayed to all participants when the presenter pauses their screen-sharing during a meeting.
Raise Hand
The Raise Hand feature is a straightforward option for catching a speaker's attention without interrupting them during a meeting. Users can access it from the main meeting toolbar.
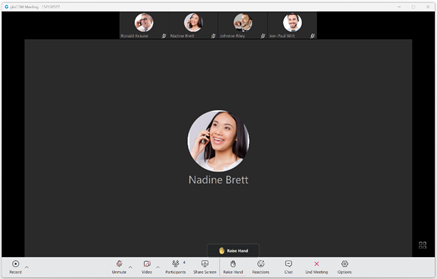
As soon as the Raise Hand option is activated, the icon color in the user's main toolbar changes to make the user aware that the option is active and vice versa.
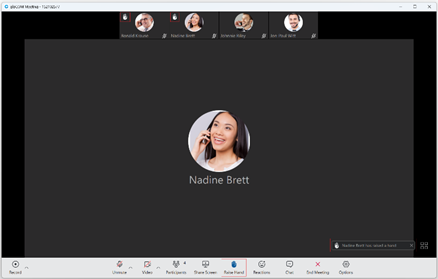
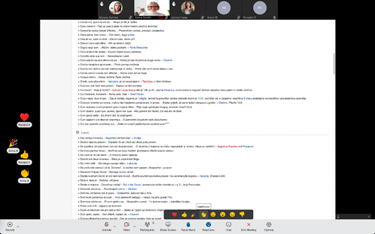
The participant's raised hand is displayed in the upper left corner of their video stream within the meeting screen (in both carousel and grid view), and they are also listed in the participants list next to their names. Additionally, on the desktop application, the user will also receive a notification message in the lower right corner that someone has raised their hand.
Sound notification for this option is also presented. If users want to mute it, they can do it by navigating to Preferences -> Meeting -> General and unchecking the checkbox next to the "Play sound notification on raise hand" option. This option is enabled by default.
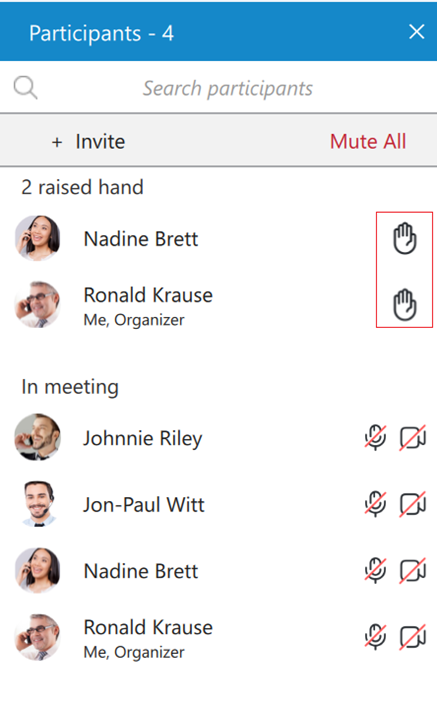
While in screen-sharing mode, the presenter will be notified when someone has raised their hand. The floating control bar will appear with a blinking raised hand next to the Participants button, changing its color from transparent to blue to inform the presenter that somebody wants their attention. The raised hand will also appear within the participants list next to the name of the participant who raised the hand. As long as at least one hand is raised, a blinking hand will be displayed next to the Participants button.

When the participant raises their hand, the organizer and co-organizers can lower it by clicking on the raised hand icon next to the participant's name in the participants list.
In-meeting Reactions
In-meeting reactions allow users to express themselves visually during the meeting by using reactions. Users can access this feature by clicking the Reactions button in the meeting's main toolbar. This will open the reactions menu, where they can choose which emoticon to use.

When the user clicks a desired reaction, an animated version of it will float upwards on the left side of the screen, along with the sender's name below the reaction.
Only one reaction can be sent at a time.
Suppose users want to hide reactions from other participants. In that case, they can navigate to Preferences -> Meeting -> General and uncheck the checkbox next to the "Show reactions" option.

Reactions are enabled by default.
Meeting Chat
To open the chat, click on the Chat button within the main meeting toolbar. The meeting window will expand with the chat on the right side, where users can exchange text and file messages during a meeting and send emojis. To close it, click the X button in the upper right corner of the chat. Alternatively, you can click on the Chat button again to close it.

Notifications for all received messages will be displayed at the top of the Chat button as a red badge with a number representing the total number of messages received within the chat, as shown in the picture above.
If users right-click inside a message bubble (gray or blue rectangle), a context menu appears with the Copy option, which allows users to copy a selected message, and the Select All option, which allows users to select a message.
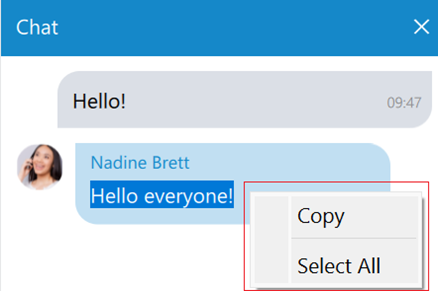
File Messages
Besides regular text messages, users can use the meeting chat to share files.
Files larger than 10 MB cannot be sent.
All files within the chat are displayed as thumbnails containing information like the file name and size. At the bottom of the file message is an icon used to open, download, show upload/download progress, or retry file upload/download, depending on the file status.
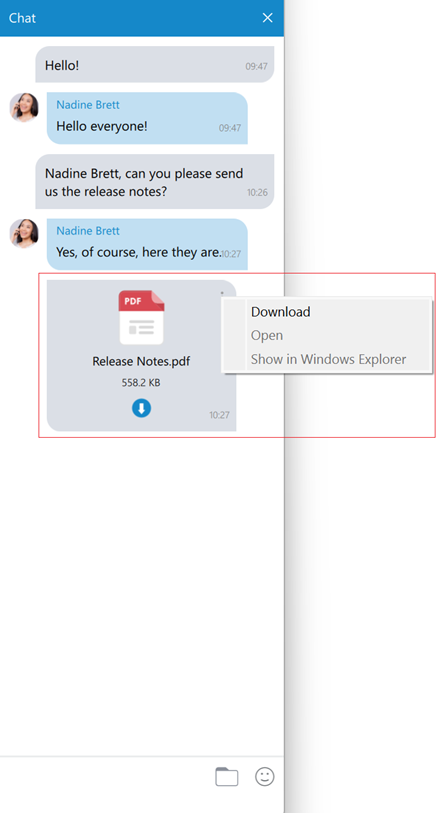
At the top right of the file message is a three dots button containing these options:
- Download: Allows the user to download a file
- Open: Will open the file in the default application.
- Show in Windows Explorer for Microsoft Windows (Show in Finder for macOS): Will open the folder containing the preselected file, which helps locate the file on the file system.
Input Field
An input field at the bottom of the chat window is used to send text and file messages. After typing a message, press the Enter (Return) key on your keyboard to send a text message.
A folder icon allows users to send files. Clicking on it opens a dialog where the user can pick up to 5 files to be sent to the chat. The user can also send files by dragging them from Windows Explorer (Finder on macOS) to the messages area within the chat.
An emoji icon allows users to send emojis. Clicking on it shows an emojis window where they can browse through emojis separated into categories. At the bottom of the emojis window is a list of the most recently used emojis.
End/Leave Meeting
As the name says, it allows users to end/leave meetings.
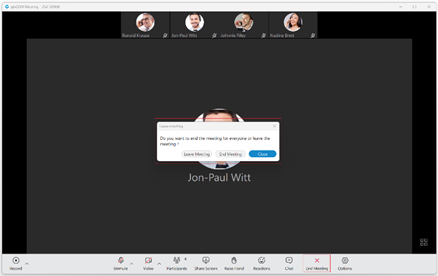
After clicking on it, a modal dialog will pop up with the following options:
- Leave Meeting: Allows users to leave a meeting.
- End Meeting: Allows users to end a meeting. (Only the organizer and co-organizer can end a meeting.)
- Close: Will close the modal dialog without leaving/ending a meeting.
Options
It shows additional options for screen sharing, video, participants, and the meeting.
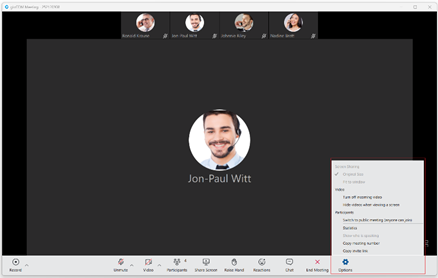
Options are as follows:
- Screen Sharing:
- Original Size: The Original Size option lets users view shared content in its actual, unscaled dimensions. When selected, the content is displayed at its native resolution, ensuring that every detail is presented as it appears on the sharer's screen. It is particularly useful for pixel-perfect work, detailed graphic design, or when precise visual accuracy is needed. However, depending on the viewer's screen resolution, this option may require scrolling to see the entire shared content if it is larger than the viewing area.
- Fit to window: The Fit to Window option sets a shared picture display mode based on the window size. In this mode, when the window is resized, the picture is resized. The picture size matches the window size apart from the window space needed to maintain the picture's height-to-width ratio.
- Video:
- Turn off/on incoming video: Turns off/on incoming videos.
- Hide videos when viewing a screen: The Hide videos when viewing a screen option hides the video panel from the top of the screen when screen sharing is active. (Only the viewer's side.)
- Participants:
- Switch to public meeting (anyone can join)/Switch to regular meeting (invitees only): The organizer and co-organizer can toggle the meeting from private to public and public to private.
- Statistics: Statistics provide the user with details about the network quality during the meeting. They include metrics about Audio, Video, and Screen sharing quality.
- Show who is speaking: The Show who is speaking option opens a speaking label that provides information about who is talking while screen sharing is active. (Only the viewer's side.)
- Copy meeting number: Copies the meeting number.
- Copy invite link: Copies the invite link.
Suppose a network connection problem affects audio quality. In that case, a notification will be displayed in the lower-left corner of the meeting window, informing the user about the cause of the bad audio.
Multiple co-organizers of the meeting
Using the co-organizer role in Meetings ensures that there is more than one person that can manage important settings in a meeting. It’s a very useful role if the organizer will not be present and as a support to the organizer in terms of being able to co-manage.
Assign co-organizers
One single Meeting can have multiple coorganizers. Meeting participants can be promoted to Coorganizers from desktop app as follows:
- While scheduling a meeting - participants added to the meeting can be promoted to co-organisers
- When the Meeting has already started, from the participants list - using right click on the name will allow Organizers to assign this role to the participant
Add coorganizers while Scheduling meeting
After adding participants to the meeting (While scheduling a meeting), right click on the participant name will open a drop-down menu that contains the Assign Co-Organizer option. Press this option to promote the participant to the Co-organizer role. Note that the participant has been added to the Co-organizers list in the Schedule meeting window.

If you mistakenly promote some participants to be co-organizers and want to remove them from co-organizers, it is possible by clicking on the X sign next to the co-organizer name. Co-organizer will be removed.

These co-organizer roles are also visible in corresponding Meeting details, in the Scheduled Meetings list:

Add coorganizers from Participants list
Organizers have permission to assign co-organizers during the meeting. This is possible from participant list. Right click on the participant’s name will show all options for managing participants. Press Assign Co-Organizer option to promote selected participant to Co-organizer.
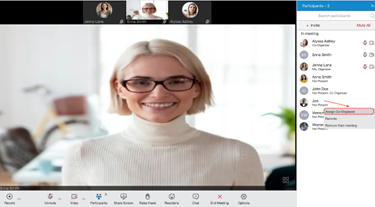
All co-organizers that join meeting via desktop app will have Co-Organizer label in meeting participants list, right below their name - the same way all other labels are added.
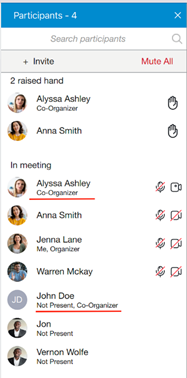
Co-Organizers permissions
Once they are created, the Co-organizers themselves will be able to:
- Start, Edit and Delete the meeting from Schedule meetings list
- Add & remove participants, assign co-organizers, etc while editing the meeting
- Add and remove participants during the meeting
- Mute and Remove participants from the audio during the meeting
- Assign co-organizers during the meeting
- Lower participants Raised hands during the meeting
- End the meeting
Start, Edit and Delete the meeting from the Schedule meetings list
As a Co-organizer, you are able to Start, Edit and Delete meetings from the meeting list. To do so, navigate to the Meeting list and select meeting. These options are available the same way as you are the organizer.
While editing the meeting from Schedule meeting list, you are allow to add & remove participants and assign co-organizers as well.
Co-Organizer permissions in a Meeting
In a meeting, Co-organizer has almost the same permissions as the organizer. Most of these options are available from the Participants list:
- Click on Invite button to add new participants
- Right click on participant name in the list to manage that particular participant using one of the following options: Assign co-organizer, Mute, Remove participants from the audio and Remove participants from the meeting
- Press Raised hand icon next to the participant name to Lower the participant Raised hand
- End the meeting - Co-Organizers that join the meeting via the desktop app have the option to End the meeting - the same way as Organizers can do it.
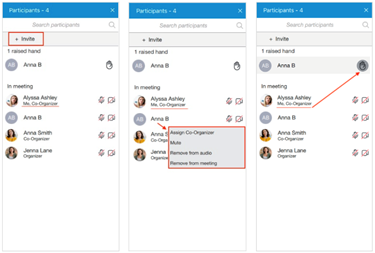
Outlook integration
Outlook integration allows user to manage gloCOM Meetings from Outlook. This includes following:
- Schedule a Meeting
- Start Instant Meeting
- Start Meeting with multiple contacts
- Cancel a Meeting
- Convert existing event to gloCOM Meeting
Schedule a meeting
User can Schedule gloCOM Meeting from outlook main tab.
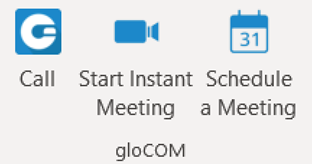
After cliking on to Schedule meeting, user should see an outlook meeting appointment window with a schedule settings dialog where can set the meeting private or public.
After confirmation, outlook appointment interface is filled out with meeting data.
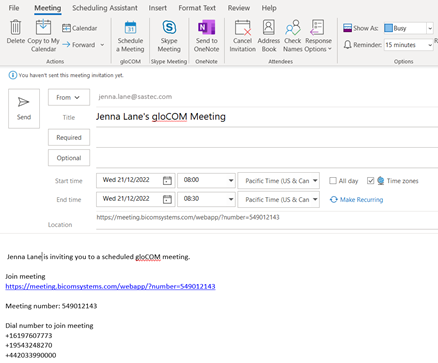
A user is allowed now to edit this invitation - to change subject, body; set date and time, add participants, etc. When enter all necessary data, user should Send invite to participants.
Meeting then will be added to gloCOM Meeting list.
Starting instant Meeting with one or multiple contacts
User is able to Start Instant Meeting from outlook main tab if press gloCOM Start Instant Meeting icon. This will start instant meeting without any participants.
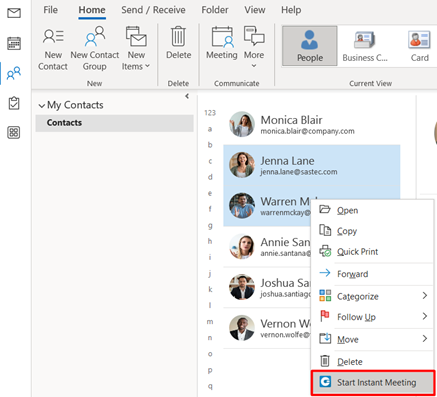
Another option is to Start Instant Meeting with one or multiple contacts, by selecting them from the contact list in outlook. Selected contacts will receive a Meeting invitation.
Cancelling a Meeting
In order to Cancel the Meeting, user should open that Meeting from the outlook calendar list, and choose gloCOM Cancel Meeting option.
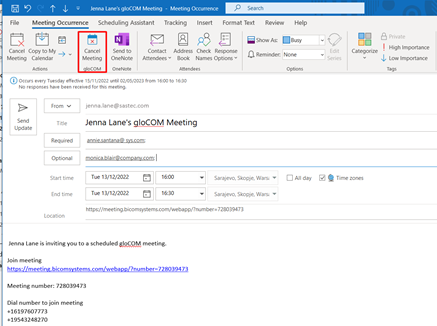
After that, user should press Sent Update icon to inform all invitees about cancellation.
Meeting then will be removed from gloCOM Meeting list.
This option will only delete gloCOM Meeting. Outlook appointment will not be deleted.
Convert existing event to gloCOM Meeting
To convert outlook appointment into gloCOM Meeting, user should do the following steps:
- Find an existing event in Outlook calendar and open it
- Click on Schedule meeting icon
- Edit your meeting if needed
- Send Update to participants
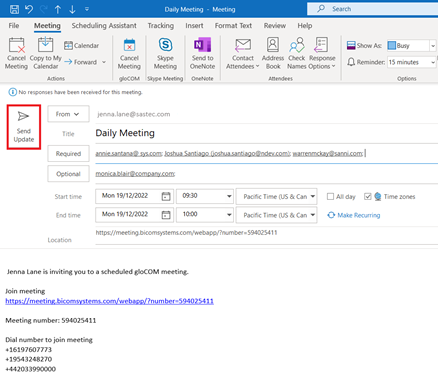
Meeting is now added to gloCOM Scheduled Meetings list.
Meeting Licences
The limitations of the Meeting packages are as follows:
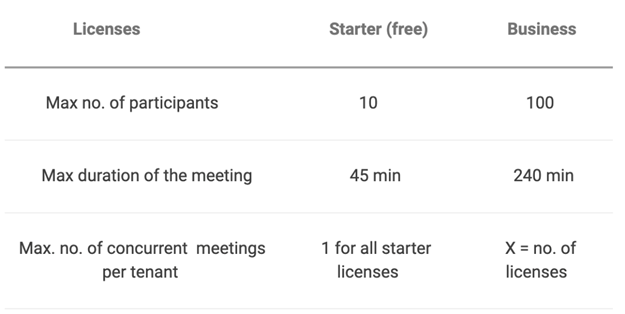
Starter package is defaualt one. This means that will be automatically assigned to all gloCOM Meeting users.
So, if user exceeds limitations for current package type, following info messages appears:
- Message when user exceed number of invitees - when scheduling meeting or adding participant to existing meeting
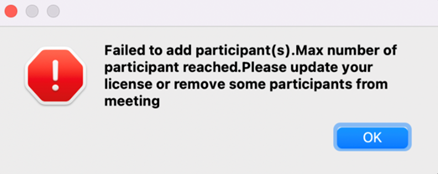
- Message when user exceed number of meetings for current license type
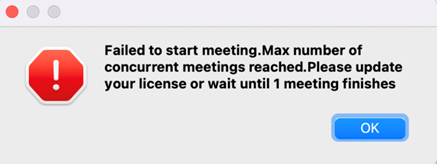
- Message when user does not have license
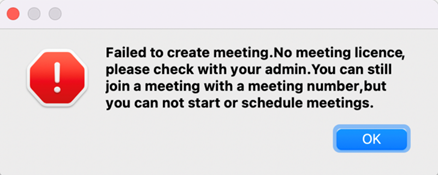
Chat
gloCOM brings a unified chat between Desktop, Web and Mobile applications. Chat history is stored on the server and is always synced between all your devices. This means that if you need to leave the office but you were having an important chat discussion with your colleagues you can seamlessly continue chatting using your mobile application. Also, in case you change your PC or laptop your full chat history will be synced the first time you log in on the new computer.
Full history sync
After every log in the application makes sure that your chat history is always synced and that you have all messages available on your device.
During the sync there is an indication on the chat module icon in the main window to inform the user that the sync is currently in progress.
If you open the chat window during sync you will see an informative message, with a progress bar indicating the sync progress.
If chat sync has failed there is a warning in the chat window with the option to retry the sync by pressing the Retry button.
In case that chat sync has failed because chat server was down at the time you logged in, the application will automatically start the sync process again, once it detects that the server is back up.
Chat server unavailable
If chat server is down you cannot send nor receive messages until it gets back up.
While the chat server is down there is an indication on the Chat module icon in the main window to alert the user.
If you open the chat window while the server is down, there is also an informative message that the chat server is not connected.
As soon as the application detects that the chat server is back up the warning is dismissed and you can continue chatting where you left off.
Starting conversations
Click the Chat module icon in the main gloCOM window to open the chat window. The conversation list on the left side of the window displays all users' conversations, while the right shows the currently selected conversation.
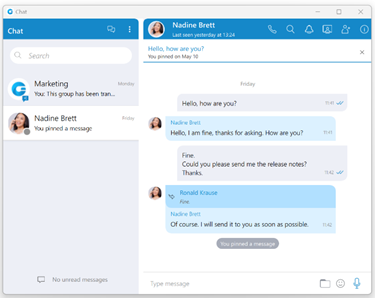
There are a few ways to start a conversation, or to open the existing conversation with another user:
- Click on the chat icon when hovering over a user in the main window (only for Grid View).
- Right-click on a user in the main window, and choose the option Chat from the menu.
- Double click on a user in the main window (if your default double click action is set to Chat inside the Preferences).
- Select multiple users in the main window, right-click, and choose the option Group chat from the menu to create instant groups from the main window.
- Search for a user inside the chat window and click on the desired user.
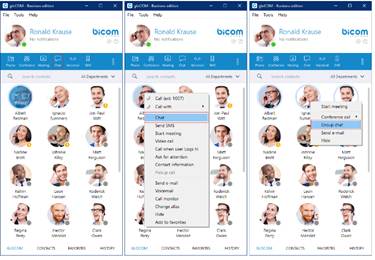
Top blue bar
The top blue bar at the top of the window consists of two parts. The Create Group and Options buttons are positioned on the left side.
The Create Group button is used for creating groups, while the Options button contains the following options:
- Create Group
- Close All Chats
- Show Closed Chats
- Legacy Chat History
- Re-sync the entire chat history
- Options
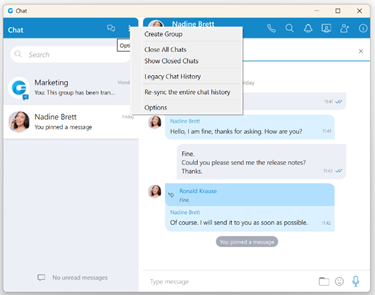
Create Group Chat option is used for creating group conversations (as the group creator, you are automatically the group administrator). Two types of groups are available. The first type of groups are ordinary groups, meaning that the chat history will not be available to newly added participants. The second type of groups are groups with visible chat history, meaning that the full chat history will be available to newly added participants.
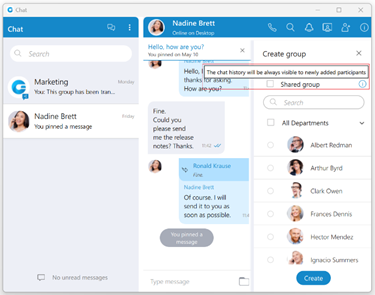
To create a group with visible chat history, check the option Allow full history visibility.
- Indicates that the chat history is visible to newly added participants.
The group name may or may not be provided during the group creation. If the user does not provide a group name, the group name will be just Group. However, the user can change the group name at any time after creating the group by clicking on the group name.

Filtering and selecting contacts are the same as described in the conference section. The user can filter contacts by name, extension number, and department. Created groups are permanent, meaning the user will remain a group member after closing the application.
It is possible to have multiple groups with the same participants and the same or different names. For example, you could create Sales Reports and New Release groups. Both groups can have the same participants, and the user can use them for various topics, so unrelated matters are not mixed up in a single conversation.
Group chat can be created from one-on-one conversations and conference calls.
Close All Chats option is used to close all your conversations easily without having to close each one manually.
Show Closed Chats option is used to see all of your closed conversations so you can find them and move them back to active.
Legacy Chat History option is used to show chat history from previous versions so you would not lose all of the messages you had in your chat history prior to the update to gloCOM version 6.0. This chat history is kept only for those purposes since old chat messages cannot be migrated to the new chat.
Re-sync the entire chat history option is used to manually re-sync the entire chat history. This option should be used only in case of chat history corruption.
Options option is used to quickly navigate to Chat section in the Preferences window.
The right side of the bar provides information about the currently selected conversation, such as its avatar, the user's name (or a group name in case of a group conversation), and various action buttons available for that conversation. Click on the name to open the Contact Information (in case of the group conversation, the info section will be opened after clicking the name or the label below)
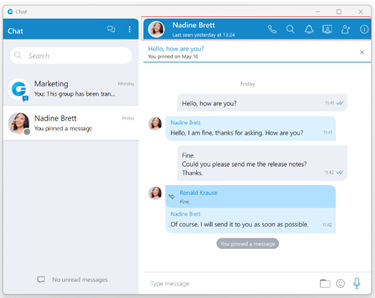
Below the name is information about the user's presence and status, e.g., is the user currently online, what is the user's status message (if any), is he currently away from the Desktop, etc. For group conversations, a label indicates the number of participants in the conversation.
The list of the action buttons is as follow:
Call the currently selected user (create a voice conference in case of a group conversation).
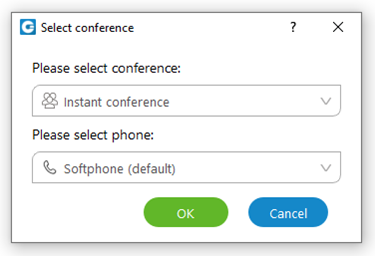
Search for messages from the current conversation.
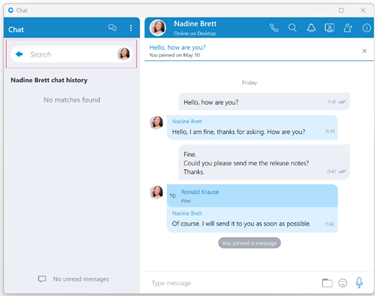
Ask for attention - the user in the current conversation will be notified that you need their immediate attention. Not available for group conversations.
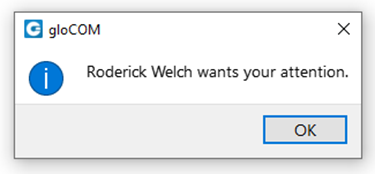
Start or Schedule a meeting with all chat participants.
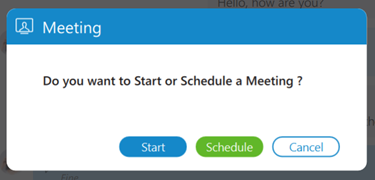
Add more users into currently selected conversation.
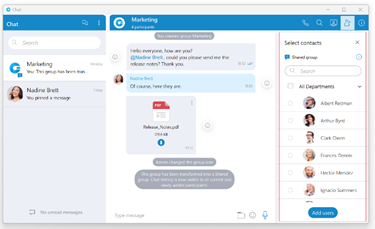
Open the chat info.
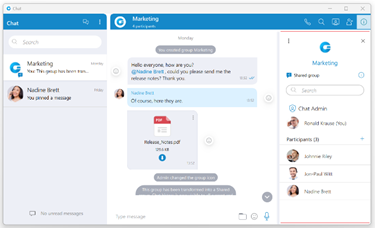
When adding users into the currently selected conversation you can filter users list by searching for a user’s name or extension. You can also filter by department, or even add a whole department into the conversation. Added participants cannot read previous messages in the conversation.
To collapse the users list and show a list of departments click on the name of the currently expanded department. To select all users from the currently expanded department, click on the checkbox next to the department name.
Chat Info
Single chat conversations
Info drawer shows all participants within the selected conversation. Furthermore, it allows users to add more participants to the selected conversation by clicking on the + sign located on the right of the Participants label. This way, the user can easily create a group chat conversation from a single chat conversation. Additionally, by hovering over each participant, the user can see information about their presence and available actions.
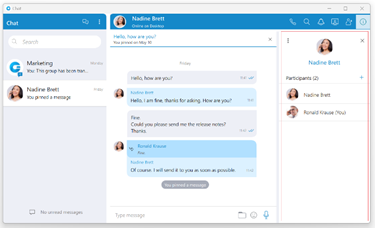
The Options button contains:
- The Show Files option shows all shared files within the selected conversation.
- The Delete conversation option deletes the selected conversation.
While hovering over a participant, the following action is available:
Call the hovered participant.
Group chat conversations
The Info drawer shows the group chat icon, the group name, the type of group, the group administrator, and all participants of the selected group conversation. A group administrator can change the group chat icon and group name, remove participants from the group, and select a new group administrator.
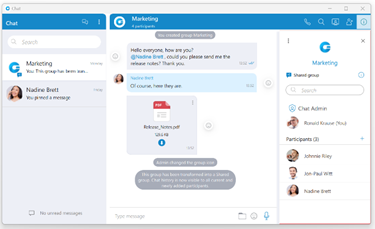
The Set group chat icon option allows the group administrator to set/change the group chat icon at any time. Clicking on the group chat icon opens the file explorer window, where an image from the computer can be selected as a new group chat icon. In case the group chat icon has already been set, clicking on it will open a drop-down menu with the following options:
- Change icon: This option allows the administrator to change (update) the group's chat icon.
- Reset to default: This option resets the group's chat icon to the default value.
To change a group name, the administrator needs to click on the group's current name, type in a new name, and press the Enter key on their keyboard.
Furthermore, the administrator can add new participants to the selected conversation or filter participants of the conversation. Additionally, by hovering over each participant, the user can see information about their presence and available action buttons.
While hovering over a participant, the following action buttons are available:
Call the hovered participant.
Open the single chat conversation with the hovered participant.
Remove the hovered participant.
The Options button contains Show Files,Transform into Shared group, Mute, and Leave options.
- Show Files: This option shows all shared files within the selected conversation.
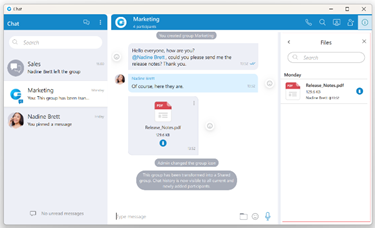
- Transform into Shared group: This option allows the admin to change the existing standard group into a shared group with full history visibility to all existing and newly added participants. Once transformed, it cannot be undone. Caution should be exercised when using this option.(It will be displayed within the drop-down menu only for the standard group chat conversations.)
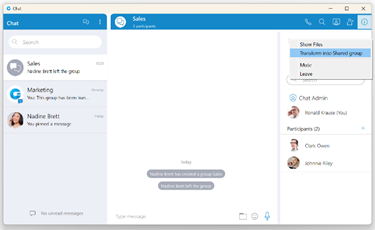
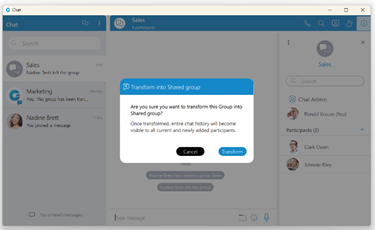
- Mute/Unmute: This option mutes/unmutes the selected conversation.
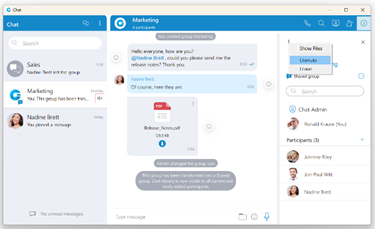
- Leave: option allows the user to leave the selected group conversation and choose what they want to do:
- Leave: It will leave the group and keep the chat history.
- Leave & Delete: It will leave the group and delete all chat history.
- Cancel: It will cancel the leaving process.
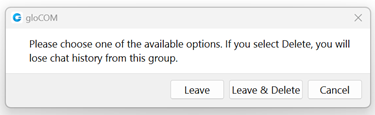
Finally, the group administrator can select a new group administrator by clicking the Transfer button next to their name and selecting a new one. To confirm the transfer process, click on the Transfer button at the bottom of the Info drawer. As a result, a confirmation dialog pops up asking for the confirmation.
Click the Cancel button at the bottom of the Info drawer to cancel the transfer process.

If the group chat does not have an administrator, anyone can become an administrator by clicking the Assign myself button below the "No admin assigned" label. As a result, a confirmation dialog pops up asking for the confirmation.

Files overview
Selecting the Show Files option from the drop-down menu displays all sent and received files inside the conversation.

You can search for a particular file by its name. Click the file thumbnail or the file name to open the file if it is available, or offers to download it if the file has not been downloaded yet.
File name, file size, sender, and time are shown for each file. Depending on the file direction (incoming/outgoing) and file status (uploading/uploaded/ready to download/downloading/downloaded) the button on the right of the file name provides certain actions:
Click to download the file.
File is already downloaded, click to show the menu and choose from Open, Show in Windows Explorer for Microsoft Windows (Show in Finder for macOS) and Save As options.
- Open option opens the file in the default application
- Show in Windows Explorer/Show in Finder option opens the folder containing the file and selects the file which is useful for locating the file on the file system.
- Save As option creates a copy of the file in the desired location with the pre-filled file name. The file name, by default, will be the same as the file's name within the gloCOM Desktop application.
Show progress of currently uploaded/downloaded file.
Click to cancel current uploading/downloading. Visible when you hover the progress circle.
Mention participants in group chat conversations
The mention as a feature represents a good way to get someone's attention within the group conversation. It allows the user to mention one or more participants and provide the context of their mentioning within the message. The mentioned participants will receive a notification even in the group conversations they have currently muted.

To mention a participant, the user needs to enter the @ sign followed by the name of the desired participant. Immediately after entering the @ sign, the list of the participants who can be mentioned will be displayed above the input field.

Only participants from the group chat conversation can be mentioned.
The user has a few possibilities for selecting participants:
- The first includes scrolling through the list using the up and down arrow keys and selecting the participant by pressing the Enter (Return) key on their keyboard or using the mouse wheel and clicking on the participant.
- The second is to continue entering the participant's name after the @ sign. In that case, the list above the input field will only display participants whose names match the entry.
The mentioned participant will be colored in blue within the conversation.
Clicking on the mentioned participant within the conversation brings a pop-up menu with the following options:
- Call
- Chat with
- Contact information
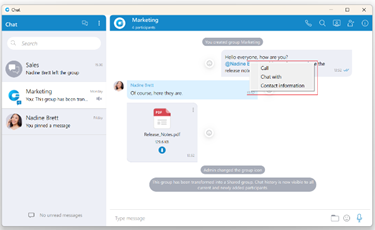
Search and Chat History
The Search field below the Create Group and Options buttons, has multiple purposes:
- Start a new conversation or open an existing conversation by searching for a user’s name, a user’s extension or a group name, and click on the desired item in the list
- Chat history
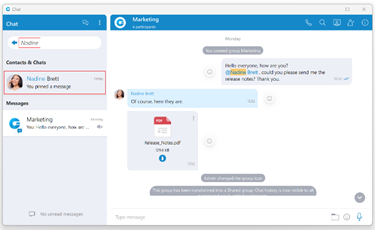
Unlike the versions prior to gloCOM 6.0 chat history is now integrated into the chat window so you don’t have to open another window to search for a message. When you type in a term in the search field, the application is going to find all users or existing conversations that match the term, and also find all messages that match the term. Users and existing conversations are positioned on the top, followed by all messages that match the term, sorted from the most recent one to the oldest one.
If you click on any item in the Contacts & Chats section, the application is going to open the selected conversation and clear the search field.
On the other hand, if you click on an item in the Messages section, the application is going to open the conversation, focus the desired message and load a few messages around it to give you the context of the conversation at that point. From there, you can scroll up/down to load older/newer messages, where every occurrence of the searched term is going to be highlighted.
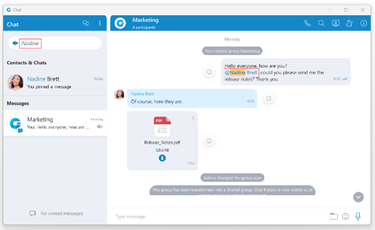
Once you have found what you were looking for, you can delete the term in the search field to exit the search mode or click on the button on the left side of the search field. This enables you to search your entire chat history without ever leaving the chat window.
If you type in more than one word in the search field, the application is going to find all messages that contain both of those words in any order.
For example, searching for "Hello Bob" matches all of these:
- Hello, how are you Bob?
- Bob? Hello? Are you there?
- Hello Bob, do you have a few minutes?
- hello Bob, how are you?
But maybe you just wanted to find the last two messages, where words Hello and Bob are right next to each other and in the right order (where the word Hello comes before Bob). In that case you have to put quotation marks around the term.
For example, search for “Hello Bob” matches just these:
- Hello Bob, do you have a few minutes?
- hello Bob, how are you?
As you can see in the examples above search in the chat window is case insensitive.
Conversations list
Below the search field is a list of all chat conversations sorted by their most recent activity. These conversations are persistent, meaning they will appear in the chat window even after restarting the application. To remove the conversation permanently, users have to delete the conversation, which can be done from the info drawer. However, to close the conversation, hover over the conversation and press the x button that appears in the top right corner of the conversation. This way, users can keep only those conversations they are currently interested in visible. Closing all conversations can be done by selecting the Close All Chats option from the Options drop-down menu above the search field. Any activity within closed conversations will move them back to the active conversation list (new messages, new participants added, etc.). Hence, users will always catch the latest messages and events. Users can find closed conversations using the search field above the conversation list or by selecting the Show Closed Chats option from the Options drop-down menu above the search field. From there, any closed conversation can be moved back to the active conversation list by clicking on it or the icon at the top right corner while hovering over it. Click the Back to active chats label to return to the active conversations list.
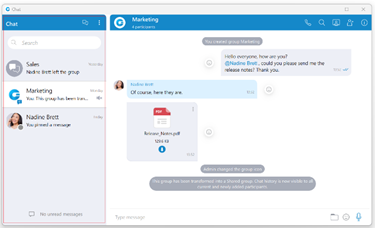
Conversation with a user which has been deleted from PBXware will be marked with a prefix (Deleted). You can no longer send messages to this conversation, but it is still useful because of the chat history and all existing messages with that user before deletion.
When you hover a session, besides the x icon there is a dots icon in the top left corner of the conversation.
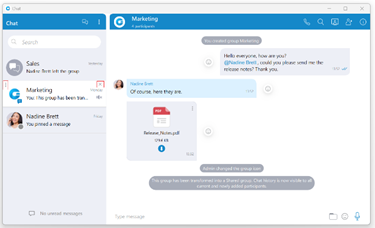
Click on it will open a drop-down menu with the following options:
- Search
- Call
- Pin Chat
- Mark as Read/Unread
- Mute (only for group conversations)
- Close All Except This Conversation
Also, right-clicking on the chat conversation in the conversations list will open the same drop-down menu.
Search option allows you to search for messages from that conversation. This is useful to search only for messages from a specific user unlike global search which searches for messages from all conversations. There are two ways to get out of this mode: by clicking on the back icon located on the left side of the search field, or by pressing the ESC key.
Call option allows you to call the user or to create a conference call in case of a group chat.
Pin Chat allows you to pin the most used conversations on the top of the conversation list. The last pinned conversation is always on the top of the conversation list. You can unpin the conversation in the same way as pin, and also by clicking on the pin icon that appears if a conversation is pinned. The user can rearrange pinned conversations according to their needs by using the drag and drop options. This allows them to define priority for pinned conversations.
Mark as Read/Unread allows the user to explicitly mark the conversation as Read/Unread. If they mark the conversation as Unread, the Unread indicator will show up for that conversation. It informs the user to look at this conversation again and take some actions if needed. Any action inside the chat conversation with the unread status will remove the Unread indicator. Also, opening the conversation or explicitly marking it as read will remove the indicator.
Mute option is used if you want to stop receiving notifications for a group chat maybe because there are too many messages exchanged and it distracts you. You can unmute a group chat in the same way as mute, and also by clicking on the speaker icon that appears if a conversation is muted. You can also Mute/Unmute a conversation from the Chat Info screen.
Close All Except This Conversation option allows you to close all conversation except this one. This is useful if you have only one conversation you are currently engaged in, so you want to hide all others so they don’t distract you.
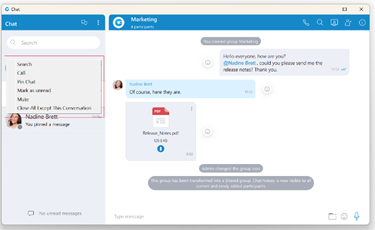
For each 1 on 1 conversation in the list you can see:
- User’s avatar with his status icon
- User’s name
- Last message in the conversation
- Time of the last message in the conversation
- Number of unread messages (if any)
For each group conversation in the list you can see:
- Group chat icon
- Group name
- Last message in the conversation
- Time of the last message in the conversation
- Number of unread messages (if any)
While in search mode conversations list will change its items according to the searched term which is explained in the Search and Chat History section.
Unread messages indicator
An indicator for unread messages is at the bottom of the conversation list. This is helpful if users have scrolled down and do not see their most recent conversations or when they are in search mode.
If there are any unread messages the label and the icon are emphasized in blue color to draw the user's attention.
Click on a label to open up a menu showing a list of all conversations with unread messages indicating the number of unread messages in the parenthesis. Also, there is an option to mark all messages as read.
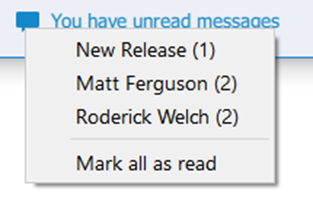
Marking all messages as read will effectively send seen to all those conversations even though you haven’t read those messages yet. Clicking on any other option besides Mark all as read opens the selected conversation. This can be used as a quicker way to find conversations with unread messages instead of looking for them in the conversations list.
If there are no unread messages, the label is not emphasized and serves only as an indicator, without any functionality.
Messages view
On the right side of the chat window you can see the messages of the currently selected conversation.
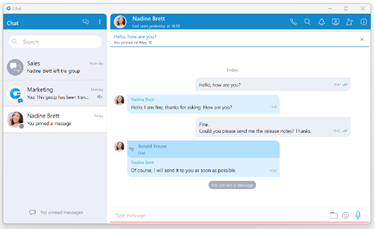
In case there are no unread messages in the conversation, the application will load last 20 messages and place the scrollbar on the bottom. If you want to load older messages, you just scroll up until you reach the top. This way you can scroll all the way to the beginning of the conversation.
In case there are unread messages in the conversation, the application will load all unread messages plus 20 additional older messages. The scrollbar will be positioned on the first unread message with the indicator so you know where should you continue reading the messages.
The keyboard's up and down arrow keys can be used for scrolling messages through chat/SMS conversations.
The typing indicator is presented above the input field of the message window and within the conversation list so you can see when somebody is typing to you. In the case of a group conversation, if more than one participant is typing at the same time, the typing message will take the form N participants are typing where N is the number of typing participants.
While you are inside of the group conversation, left-click on the participant's name or avatar inside the messages window will show a popup menu with three options:
- Call: Call the participant directly.
- Chat with: Start a one to one conversation with the participant.
- Contact information: Show the contact information.
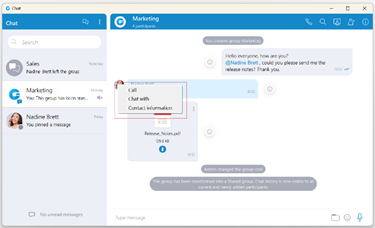
While scrolling up in the currently selected conversation, a scroll indicator appears in the bottom right corner of the messages view so you can easily move to the end of the conversation. If you receive a new message while searching/viewing the older messages, the scroll indicator will show the number of messages received. Clicking on the scroll indicator
will take you to the first received message.
Message Reactions
As the picture shows, every outgoing/incoming message has a reaction button on the left/right side of the message that allows users to react to a message.
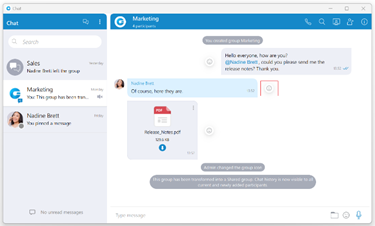
Hovering over it brings up a pop-up window containing a list of reactions that can be used to react to a message. After selecting one of the reactions, the same will be displayed next to the message instead of the reaction button, along with the last reaction (if any) and the total reaction count.
The selected reaction will be highlighted within the reactions pop-up.
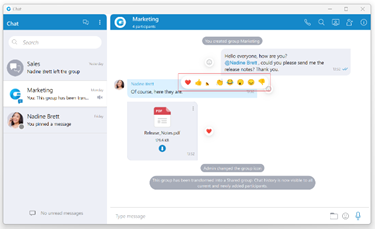
The user will receive a notification for every outgoing message when somebody reacts to it.

If a user has already reacted to a message, re-opening the reactions pop-up will present their reaction as selected. Clicking on the same reaction will remove it, and clicking on a different one will change it.
Reacting to outgoing messages within one-to-one chat conversations is not possible.
Besides the information about the delivery and seen status, the message Info contains information about reactions (if any).
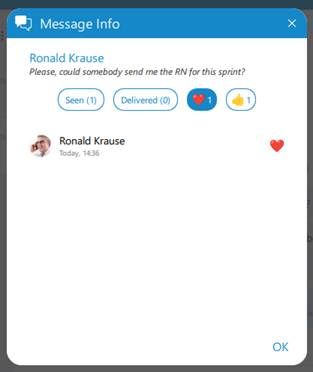
Threads
Threads, as a feature, allows users to start multiple conversations within group chat conversations, enabling parallel discussions within groups.
Please note that the Threads feature needs to be enabled in a license and configured on the PBXware before it can be used.
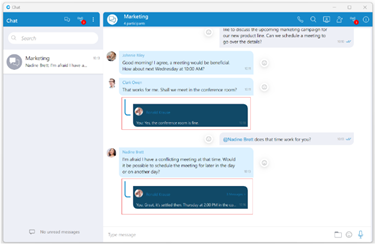
A thread can only be created from text messages.
To create a thread, right-click on the text message within the group chat conversation, select the Create Thread option from the drop-down menu, and send the message in order to create a thread.
Threads support all message types that are supported in chat conversations.
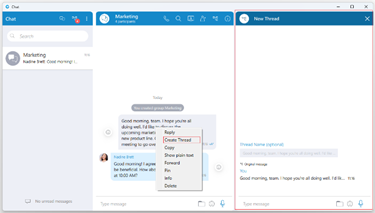
The thread creator can also specify a Thread Name while creating a thread by entering it in the designated field. If the name is not specified, the thread's name will be the message from which the thread was created.
The thread name cannot be longer than 100 characters.
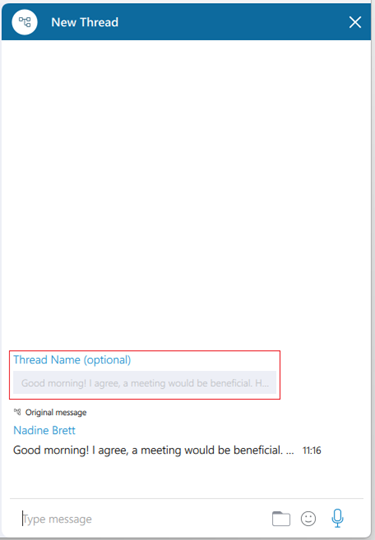
By default, the thread name is the message from which the thread was created.
However, the group administrator and the thread creator can rename a thread anytime by clicking on its name at the top of the thread panel and providing a new one. After the name is provided, press the Enter key on the keyboard for confirmation or the ESC key for cancellation.
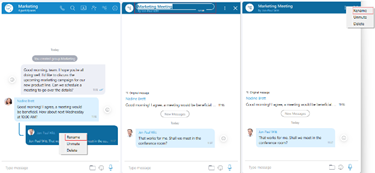
Also, renaming can be done by selecting the Rename option from the drop-down menu displayed within the chat after right-clicking on the thread or by clicking on the Three dots button within the thread panel context bar and selecting the same option from the drop-down menu.
Only the group administrator and the thread creator can rename a thread.
Deleting threads can be done by right-clicking on a thread inside the group chat conversation and selecting the Delete option from the drop-down menu. However, in case the user wants to delete the thread that has already been opened, they can click on the Three dots button within the thread panel context bar and select the Delete option from the drop-down menu.
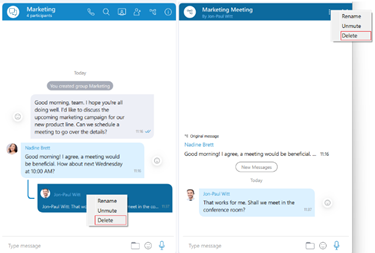
Only the group admin can delete the thread.
Notifications for all unread thread messages will be displayed as a red badge with the number that represents the total number of unread messages. Furthermore, notifications for unread thread messages for a single thread will be displayed within the thread list, which can be opened by clicking the Open threads button.
Thread List icon: Click on it to open the list of threads.
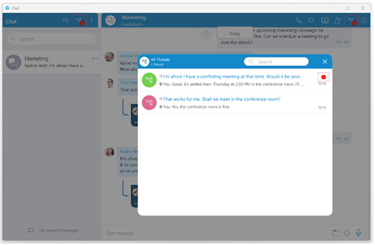
Additionally, suppose the user wants notifications for the thread message included within the gloCOM Main Window and the Dock icon.
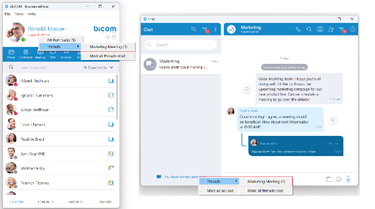
In that case, they need to navigate to Preferences -> Messaging and check the checkbox next to the "Show thread unread count in Main Window and Dock icon" option. By default, this option is disabled.
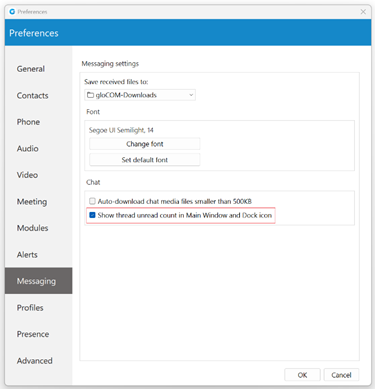
All newly created threads will be muted for all users except the creator until they send a message, unmute it manually, or if another participant mentions them.
Message states
For outgoing messages there is an indicator explaining the current state of the message:
Sending: The message is on its way to the server.
Sent: The message is sent and has reached the server.
Delivered: The message is delivered to the other user(s).
Seen: The message has been read by the other user(s).
Failed: The message could not reach the server.
Text selection and context menu
You can select text inside of messages by pressing and dragging your mouse across the messages area. Click anywhere on the messages area to unselect all messages.
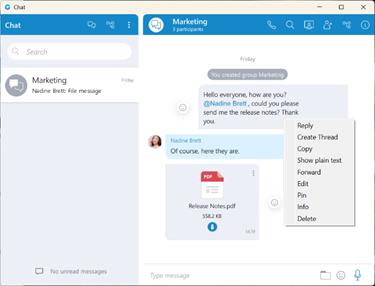
While there is any selected text in the messages area, right-clicking brings a context menu with the Copy option to copy all selected messages in the clipboard. You could also press CTRL+C on Windows, or Command(⌘)+C on macOS to copy all selected messages in the clipboard.
If you right click inside a message bubble (gray or blue rectangle) while there is no selected text, a context menu appears with the Reply, Create Thread, Copy, Show plain text, Forward, Pin, Info (only for groups), Edit(only for outgoing text messages) and Delete options.
Reply option allows users to reply to a specific message. To reply to a message, hover over it, and click on the reply button, or right-click on the message, and from the drop-down menu, select the Reply option. As a result, the message that the user wants to reply to will appear above the input field. Clicking on the replied message inside the chat will take the user to the original message.
Create Thread allows users to start multiple conversations within group chat conversations, enabling parallel discussions within groups.
Copy option is used to copy all message content to the clipboard.
Show plain text option is used to disable all message formatting (links, emojis, etc.), to see the original message source. If the user right-clicks on the message again after they have pressed the Show plain text option, there is a Show rich text option to revert it and to see the formatted message with links and emojis.
Forward option is used to forward messages and files from one conversation to another. The user can forward the message or file up to 10 conversations at once.
Pin/Unpin options are used to pin/unpin an important message or file message to the top of the conversation window. Anyone can pin/unpin the message inside the conversation. The user can pin one message at the same time. By clicking on the pinned message, will redirect the user to that message inside the conversation.
Info allows the user to see the information about the delivery and seen status of a single message within a group chat conversation.
After a certain period of time, information about the seen/delivered status will automatically clear from the server, and the following message will be displayed within the info message dialog: "Seen and delivered information is automatically cleared and may not be available after certain period of time."
Edit option allows users to modify outgoing text messages. To edit a message, right-click on it and select the Edit option from the drop-down menu. The message that the user wants to edit will appear above the input field. By clicking on it will take the user to the original message.
Edited messages will have an Edited indicator displayed inside their bubble.
Delete allows users to delete text and file messages. To delete the desired message, users can just right-click on it, and from the drop-down menu, select Delete option.
After selecting the Delete option, the confirmation dialog will show up with two options for outgoing messages:
- Delete for myself with the following sub-content: This message will be deleted only for you. Other chat members will still be able to see it. Are you sure you want to proceed?
- Delete for everyone with the following sub-content: This message will be deleted for all participants. Are you sure you want to proceed?
And for incoming messages, there is only one option:
- Delete for myself with the following sub-content: This message will be deleted only for you. Other chat members will still be able to see it. Are you sure you want to proceed?
In addition to the options mentioned above, the confirmation dialog contains the Delete and Cancel buttons.
After deleting the message, the Message deleted indicator shows up.
File message
Besides regular text messages, you can use the chat in gloCOM to share files.

For image and video files there is a thumbnail that is automatically downloaded. Under the thumbnail, there is information about the file name and the file size. At the bottom of the file message there is an icon used to open, download, show upload/download progress or retry file upload/download depending on the file status. This is explained in detail in the Files Overview section. Also, at the top right of the file message, there is a 3 dots icon. Clicking on the icon opens a menu with options to download, open, locate the file on the file system, or create a copy of the file.
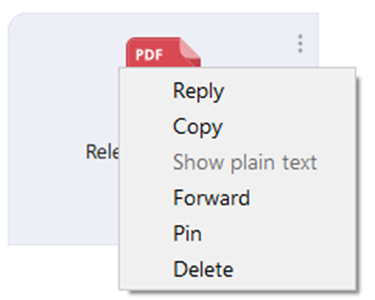
Clipboard
gloCOM Desktop supports clipboard functionality for images and files. It means that the clipboard now can be used for copying/pasting images from the external app (such as image viewer, browsers, etc.) or for copying/pasting images and files from the File Explorer (Finder on macOS) directly into the chat session. With this at their disposal, users are no longer limited to just using an image/file picker and drag & drop feature for sending images and files.
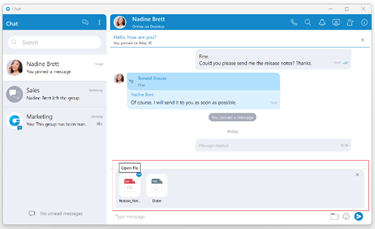
While using clipboard functionality for sending images and files, instead of sending them immediately after pasting into the chat, the application creates an attachment list that includes thumbnails within the selected chat session. Clicking on the thumbnail opens the file in the proper viewer app (image viewer for the pictures, the default video player for videos, etc.). This way, users have the opportunity to double-check selected files and images before sending.
Adding files to the attachment list while using the clipboard can be done in two ways:
- Using CTRL(Cmd on macOS) + C/V for copying/pasting files or
- Using the mouse right-clicking to copy/paste files.
Every image sent using the clipboard will be saved into the gloCOM downloads directory.
Furthermore, hovering over the file inside the attachment list displays a blue circle with the white dash at the thumbnail's upper right corner. Click on it to discard the file from the list. Discarding all files from the list can be done by clicking the x button in the upper right corner of the attachment list.
While the attachment list is active and the user selects files using a file picker or drags them into the chat, they will be attached to the attachment list. Otherwise, the app will send them immediately.
In addition, while the attachment list is present within the selected chat conversation, the user can write a text message simultaneously. In that case, the app will send the text message first and then the attached files one by one.
The maximum number of files attached to the attachment list at once is limited to five (5). Once the limit is reached, a pop-up message will appear displaying the following: Could not add files since it would violate the maximum files limit! (Max. count of all attachments: 5).
For larger images, the copy operation will take a while. During this time, the application will change the cursor type to loading, indicating that the file is being copied.
Input field
Type message field on the bottom of the chat window is used to send messages to the currently selected conversation. After typing a message press the Enter (Return) key on your keyboard to send a message. To type in a new line press Shift + Enter or Ctrl + Enter (Command + Enter for macOS).
The length of the message that can be sent is limited to 10 000 characters.
A folder icon allows the user to send files. Clicking on it opens up a dialog where the user can pick up to 5 files to be sent to the currently selected conversation. Also, the user can send files by dragging them from Windows Explorer (Finder on macOS) to the messages area within the chat window.
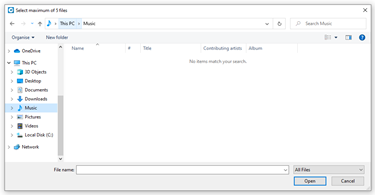
An emoji icon allows the user to send emojis. Clicking on it shows an emojis window where the user can browse through emojis separated into categories. At the bottom of the emojis window is a list of the most recently used emojis.
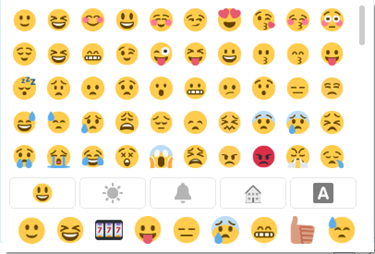
A microphone icon allows the user to record voice messages for up to 2 minutes.
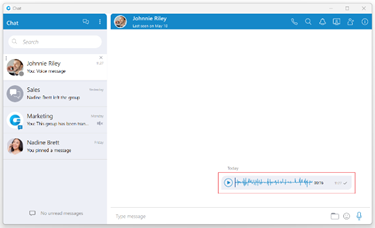
While recording, the user has the ability to use the following options:
- Discard voice message: It will discard a voice message.
- Stop recording voice message: It will stop recording. This way, the user can listen to the voice message before sending or discarding it.
- Send voice message: It will stop the voice message and send it immediately without the chance to listen to it.
While recording is active, sending text and file messages will be disabled until the user sends or discards the voice message.
Playing voice messages is possible within a chat by pressing the play button. It is possible to go back and forth through a selected voice message by clicking on the waveform.
Some chat features that are described above can be enabled/disabled depending on the server settings.
SMS/MMS
These features allow the user to send/receive SMS/MMS messages.
The MMS message is an enhancement to the standard SMS message. The main difference between SMS and MMS messages is that the user can send multimedia and other files in their messages. It includes media such as videos, pictures, audio clips, GIFs, and much more. The maximum size of uploaded files is 500 KB or up to ten (10) files per message. Additionally, MMS allows for up to 1000 characters of text in a message, which is a lot more than for a standard SMS.
The MMS feature can be enabled/disabled depending on the server settings.
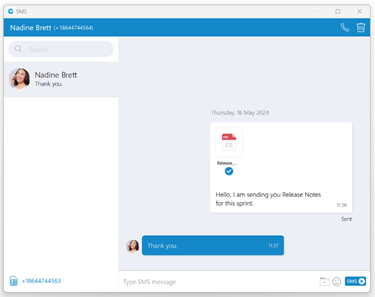
The gloCOM applications allow users to synchronize their SMS conversations and messages across multiple devices, ensuring they can access their messages from any device they use.
SMS Number
If the user has associated an SMS number with their Extension, they need to open the Personal Information screen to see it.
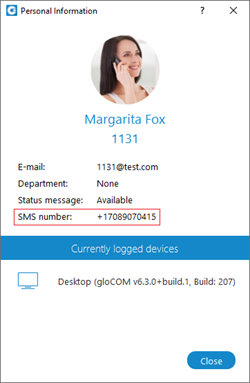
To see the SMS number of the contact, right-clicking on contact, and from the drop-down menu, select the Contact Information.
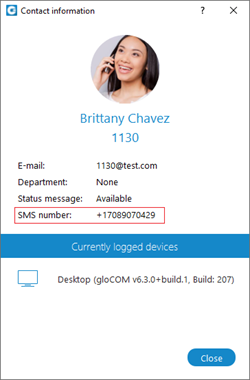
Shared SMS Number
An SMS number can be shared between multiple extensions. In case when the user receives a message from the number used by multiple extensions, the SMS conversation will be displayed as in the picture.
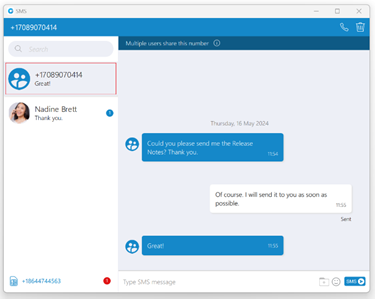
All extensions using this number can see all sent/received messages.
Furthermore, click the Multiple users share this number label within the conversation to see who uses this SMS number.
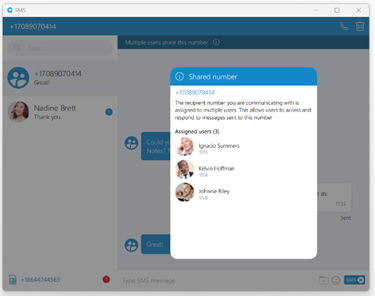
Messages of the other users you share the number with will have a header with their name and avatar, as in the picture. Your messages will not have this header.
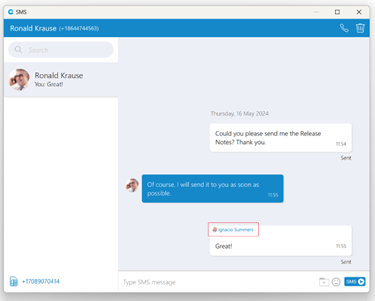
Start SMS conversation
There are two ways to start an SMS conversation:
The first way is to open the SMS window by clicking on the SMS icon in the toolbar within the main gloCOM window. The SMS window will appear. Next, enter the name or number of the contact inside the search field and click the result to start a conversation.
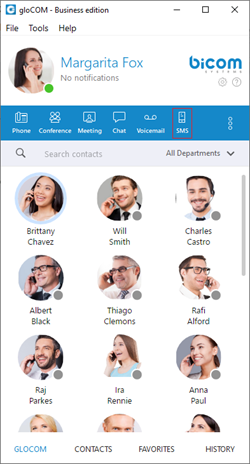
The second way is right-clicking on the contact, and from the drop-down menu select Send SMS.
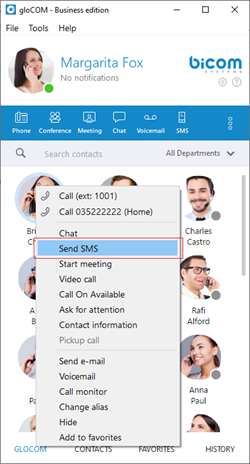
If the contact has multiple phone numbers, the pop-up window will appear with all their numbers, and the user will be able to select which number they desire to send an SMS/MMS message.
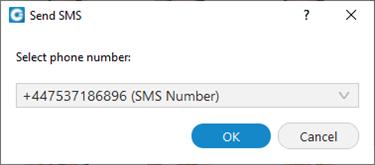
SMS/MMS Notifications
SMS/MMS notifications have the same behavior as chat notifications. When an SMS/MMS message is received, a notification pops up. Additionally, if the New SMS Message Received option is enabled within Preferences -> Alerts under the Sounds section, the pop-up notifications will be accompanied by sound.
SMS notifications are turned off by default.

The app will display the number of unread SMS messages within a gloCOM main window, taskbar, tray icon, and at the bottom of the SMS window.

To turn on/off SMS notifications, please navigate to Preferences -> Alerts and uncheck the Notify me when I receive a new SMS message option.
To turn on/off the SMS notification sound, please navigate to Preferences -> Alerts and uncheck the New SMS Message Received option.
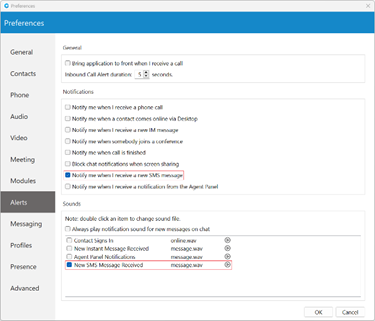
SMS Window
At the top left side of the blue bar is displayed an SMS number of contact the user is currently talking to.

On the right side of the blue bar, there are two options:
Call the currently selected user.
Delete the current conversation.
The search field is below the contact’s SMS number. The user can use it for filtering contacts, conversations, and searching messages.
Below the search field is a conversation list of all user’s conversations sorted by their most recent activity.
Next to it is the messages view. Deleting messages can be done by right-clicking on the desired message and selecting the Delete option from the drop-down menu.
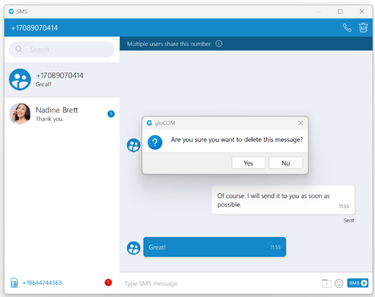
Besides the Delete option, users can copy highlighted text by selecting the Copy option from the drop-down menu.
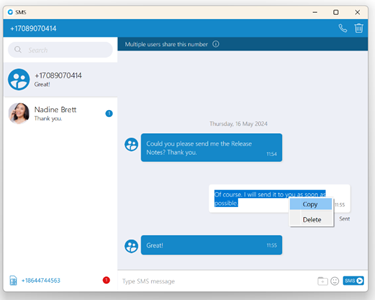
The white rectangle represents outgoing messages, and the blue represents incoming messages.
An input field is below the messages view. Click the send SMS icon on the right side of the input field to send an SMS message. The Enter key on the keyboard represents a new line.

It is not possible to send more than four (4) messages at a time. Also, the character counter appears above the send SMS icon as soon as you start typing the message.
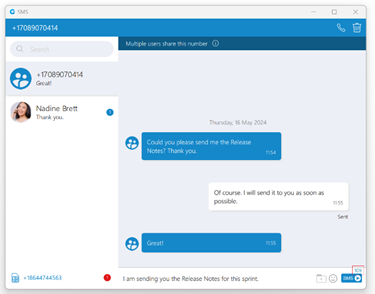
A folder icon that is used for sending files can be found next to the Send SMS icon. Clicking the icon opens up a dialog where the user can select up to ten (10) files to be sent to the currently selected conversation.
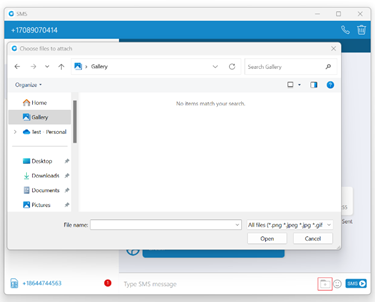
An emoji icon allows the user to send emojis. Clicking on it shows an emojis window where the user can browse through emojis separated into categories. At the bottom of the emojis window is a list of the most recently used emojis.
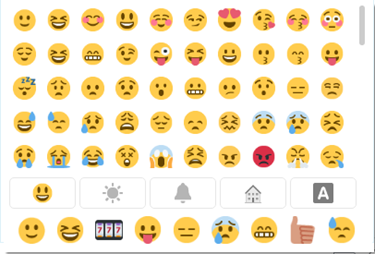
The user can upload a max of 500 KB of multimedia data.
Additionally, the user can send files by dragging them from Windows Explorer (Finder on macOS) to the message area inside the SMS window. If the amount of the selected data is larger than 500 KB or if more than ten (10) files are selected, a pop-up message will appear displaying the following: Maximum size of attached files for MMS reached. All files that exceed the previously mentioned limits will be discarded.
Please note that supported MMS files are as follows:
- Image Files: jpeg, png, gif
- Audio Files: MP3, OGG, AMR
- Text Files: PDF, Vcard, txt
- Video Files: mp4
The application will compress images (jpeg and png) before sending, which gives the user the ability to send images larger than 500 KB. The application will preserve the quality as much as possible and adjust the resolution as needed.
If a file is selected, an SMS message becomes an MMS message, which can be seen above the Send SMS/MMS icon as the counter of the remaining kilobytes is displayed instead of the character counter.
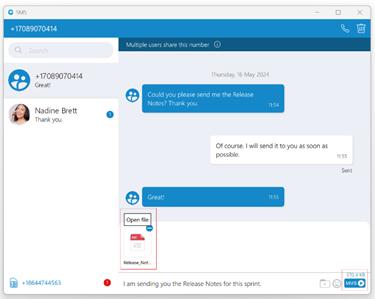
After selecting the files, a thumbnail with the file name for each selected file will be displayed above the text area within the input field. Also, it is possible to remove selected files from the MMS message by hovering over them and selecting the blue circle with a white dash at the top right corner of the thumbnail.
The gloCOM will automatically download all files smaller than 500 KB. If the file is not downloaded for any reason, the user can click on it to download it.
The associated SMS number (or the alert icon) is displayed at the bottom left side of the SMS window. What will be displayed depends on whether the SMS option is enabled or not.
If the user has associated an SMS number with their Extension, the SMS number will appear. It means that they can send/receive SMS/MMS messages. Click on it to copy it to the clipboard.
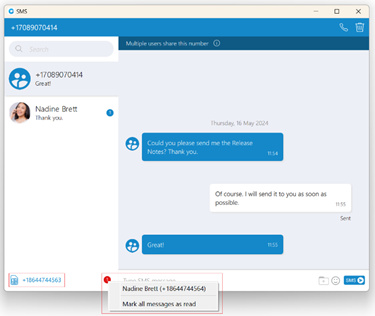
Next to it is an unread SMS messages indicator. It informs the user if there are currently unread SMS messages. It has the same behavior as the unread messages indicator within the chat window.
If there are unread messages, the red circle will appear with the number of missed SMS messages inside it to draw the user’s attention.
Click on it to open up a menu showing a list of all conversations with unread messages indicating the number of unread messages in the parenthesis. Also, there is an option to mark all messages as read.
Marking all messages as read will effectively treat all messages as read and remove the unread count indicator even though you have not read them yet. Clicking on any other option besides Mark all as read opens the selected conversation. It can be used as a quicker way to find conversations with unread messages instead of looking for them in the conversations list. If there are no unread messages, the red circle will not appear.
If the SMS number is not associated with the user Extension, the alert icon will appear instead of the SMS number with the message, No SMS number assigned. It means that the SMS/MMS messages cannot be sent or received.
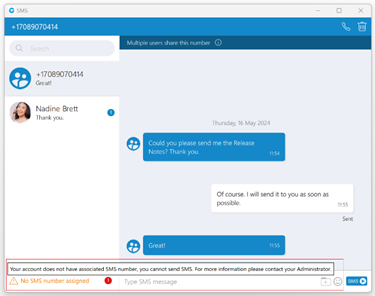
[7.6] SMS footer text
If the administrator turns on SMS footer messaging on the PBXware, an SMS footer text will be displayed at the bottom of the input field. This text will be added at the end of every SMS/MMS message, and its length is included in the length of the SMS/MMS messages.
The length of the footer text can be up to 160 characters.
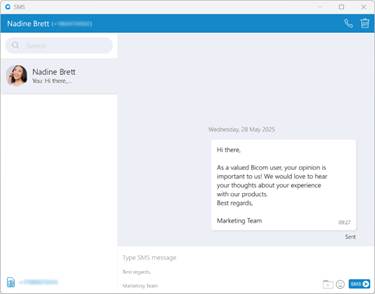
SMS Message States
The SMS/MMS message has only three states:
- Sending
- Sent (It does not mean that the message is delivered.)
- Failed (When the SMS/MMS message is in this state, click the Retry option to send it again.)
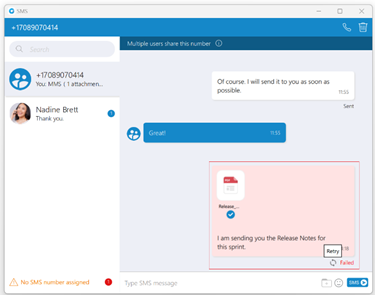
Enable/Disable SMS messaging on Desktop
By default, SMS/MMS messaging is enabled within the gloCOM Desktop application. The user can disable it if they do not want to use the gloCOM Desktop application for SMS/MMS messaging.
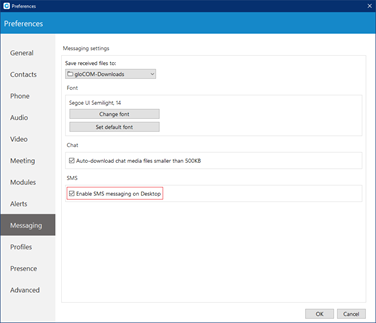
To disable SMS/MMS messaging, please navigate to the Preferences --> Messaging and uncheck the Enable the SMS messaging on Desktop option. Unchecking this option will disable sending/receiving SMS/MMS messages through the gloCOM Desktop application, but users can still send/receive SMS/MMS messages through the gloCOM GO application.
Enabling/Disabling SMS messaging on Desktop can only be done when the PBXware version is older than the PBXware 7.
Export old SMS History
To export an old SMS history, please navigate to Preferences -> Messaging and click the Export old SMS history button.
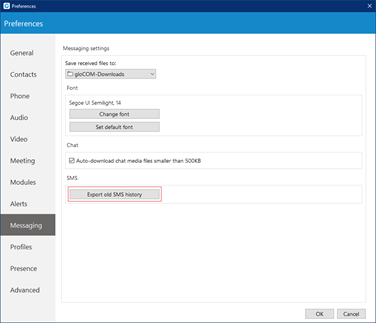
The Export old SMS history button will be displayed only when the old SMS history exists.
After clicking the button, a file picker will show up, allowing the selection of the desired location for exporting an old SMS history. All old SMS conversations will be exported as individual files within the new SMS folder created by the application. In the case of MMS messages, the application saves existing files within the SMS folder.
Preferences
Any changes made within the Preferences of the gloCOM Desktop application will be applied only to the gloCOM Desktop application on which they were made.
General
General settings
To start click on the Settings icon inside the toolbar.
Inside the General Settings section, checking the box next to Launch application at startup will start the application when your operating system starts, while checking the Log in automatically on startup will log the user in automatically every time the application is launched.
Checking the box next to Disable application scaling will disable operating system-managed scaling, which fixes issues regarding the window being too enlarged on monitors with a scaling set up in Display Settings. This option is available only for Microsoft Windows. Note that the application has to be restarted for this option to take effect.
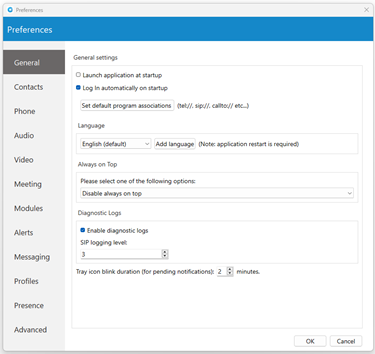
Depending on your Operating System, the Set default program associations button will allow you to choose which protocols the application will open by default (tel://, sip://, callto://, etc.).
From the drop-down menu, you can select the language and if you have your own language file you can add it by clicking the Add language button, then select the language that you wish to add from a list and then choose your language file. You will need to restart the application for the language change to take effect.
Please be informed that some pages in the Supervisor panel will be translated into a language set on PBXware.
Under the Always on Top section, you can choose whether you would like to have a call or call and contacts window always on top or if you wish to disable the always on top option. This feature will keep the gloCOM window on top even if another window, e.g., a web browser window is selected.
You can turn on or off diagnostic logs by checking the box next to it. When turned on, gloCOM will store all logs on your computer/machine. You can specify how much data/information you want to store by editing SIP and Jabber logging levels. By default, the SIP level is set at 3.
Depending on the situation you can choose between 1 to 10 levels where Level 1 would store the least amount of information and Level 10 would store all information.
You can set for how long the gloCOM tray icon will blink while you have notifications pending such as missed calls or unread messages.
Contacts
To start click on the Settings icon inside the toolbar, and navigate to the Contacts settings section. At the top, you have 3 tabs: General, Google, and Outlook.
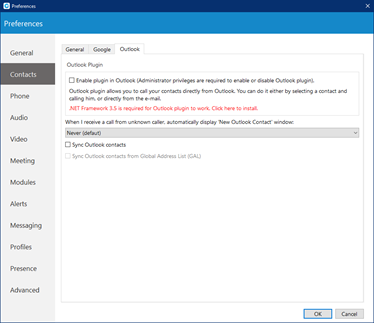
Under the Default contact double-click action you can set what action will be initiated when the user double-clicks on a contact. If chat is selected then a chat window with contacts will open, and if a call is selected then double-clicking the contact will call the contact. If you wish to sync your contacts daily, check the box next to Sync my contacts daily. Furthermore, if the user wants to convert contact numbers to E164 format, they can check the box next to Convert contact numbers to E164 format.
Next, go to the Google tab. Here you can choose to integrate your Google account contacts with gloCOM. Simply check the Enable Google contacts integration, enter your Google email and your Google contacts will sync automatically.
Outlook Plugin with gloCOM navigate to the Outlook tab and check the Enable Plugin in Outlook Contacts box. This will enable you to initiate calls directly from Outlook.
Users can control if Outlook’s add new contact windows shows up on Call started, answered or finished.
gloCOM automatically syncs your Outlook contacts. (When I receive a call from an unknown caller, automatically displays the new Outlook contact window) option, when turned on, it will open a new Outlook contact form every time you receive a call on gloCOM from a number that is not on your contacts list.
To disable syncing Outlook contact from the Global Address List, please navigate to Preferences -> Contacts -> Outlook and uncheck the Sync Outlook contacts from the Global Address List (GAL) option. By default, it is enabled.
Phone
To start click on the Settings icon inside the toolbar, and navigate to the Phone Settings section.
Softphone is not supported in the Office Edition.
When turned on, Confirm the Number when calling from a web browser and other apps will ask you to confirm the number and will also give you an option to make corrections if necessary.
If Call Waiting is turned off, the softphone automatically rejects incoming calls if the user is already on another call. The caller will hear a message indicating the user is busy on another call.
On the other hand, when Call Waiting is turned on, incoming calls will not be automatically rejected, allowing the user to receive a second call. This feature also includes an optional "Call Waiting audio notification (BEEP Sound)" option, which alerts the user with a short beep when a second call comes in. The beep will repeat every ten seconds until the call is either rejected or ended. By default, this notification option is enabled.
If Call Waiting is turned off, users will not receive calls or hear a beep.
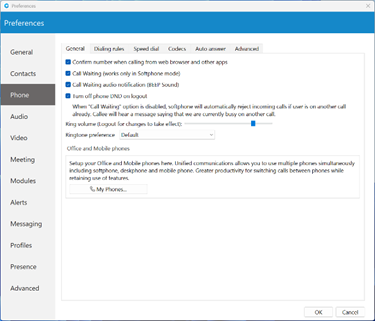
The Turn off phone DND on logout option by default is enabled. When enabled, phone DND will be turned off on logout. Otherwise, phone DND will not be turned off on logout.
Use the ring Volume slider to adjust the ring volume.
The Ringtone preference option allows the user to select between Default, Silent, and Custom ringtone mode for incoming calls.
A Default mode will generate a standard ringtone of gloCOM upon receiving a call. As the name suggests, gloCOM will remain silent upon receiving a call by selecting the ''Silent'' mode.
Additionally, suppose the user decides to use the Custom ringtone mode. After selecting it, the file picker window will be displayed, allowing the user to select the desired audio file as a ringtone for incoming calls. The selected audio file must be in mp3 or wav format. However, thanks to the implemented filter, a file picker window will not display audio files that are not in the formats specified above. This way, the application ensures that the user will not be able to select an audio file with an unsupported format.
You will need to restart the application for changes to take effect. My phones... button allows you setup your deskphone, softphone, and add a mobile number.
Under the Default tab in Agent Panel setting, Agents can choose between "Phone" and "Calls" from the dropdown. For example, if an Agent selects "Phone" as the default, the system will automatically switch back to the "Phone" tab after ending a call, making it easier to quickly dial another number. Alternatively, they can leave it on "Calls" if that serves them better. This feature allows Agents to streamline their workflow and prioritize tasks based on their preferences, improving efficiency and user experience.
Inside the Dialing rules tab users can set rules for outbound calls. e.g., If they enter 061 under text to replace and under replacement text they enter 0038761, gloCOM will replace every phone number that has 061 with 0038761. However, sometimes users would only want to replace numbers that begin with 061, and not the ones ending in 061...
For a more precise replacement, you can use regular expressions. For example, if you enter 061{6}/d under text replacement, and 0038761/1 under replacement text and you turn regular expressions on, this will replace 061 digits of every number that begins with 061 and has 6 more digits with 0038761 followed by those 6 digits. E.g. 061-123-456 would be replaced with 0038761-123-456.
Dialing rules can be applied when transferring calls by enabling the Apply dialing rules when transferring calls option. By default, this option is disabled.
Enabling the Detect and format USA and UK phone numbers for outbound calls option will auto-detect and format your local USA & UK numbers so that they can go through the system. This may cause problems in some countries so be careful when using this feature.
Inside the Speed Dial tab click on the Add button and from a drop-down menu and choose a number from 1 to 99, and in the field next to it assign the phone number that you want to Speed dial. For example, dialing #7 will dial 061-123-456 To edit an existing speed dial number select the number from the list and click the Edit button or press Remove to remove the number.
Inside the Codecs tab, select the codecs that you wish to use. Some codecs offer higher quality but take more bandwidth, some offer better compression so they are less heavy on network resources, depending on your needs you might want to turn some codecs on or off, and if you have more than one codec you can sort them by priority using the up and down arrows on the right.
Opus codec is not supported in the Office Edition.
Inside the Auto answer tab, users can enable the Auto Answer feature, which automatically answers incoming calls.
Inside the Call forwarding tab, users can enable the Call Forwarding feature, which forwards calls to provided extension/number (local/remote) or voice boxes.
Inside the Emergency Location tab, users can enable the Emergency Location feature, which allows them to enter their Emergency Location Address.
Inside the Advanced tab, you can choose to turn the encryption on or off for voice and video calls, or you can select Use the settings from server to use the settings that your admin has set.
Under the Register field, you can set how often gloCOM will send the SIP register to the SIP Server or VoIP provider to let it know where it is. It is recommended to leave the local sip port empty to allow SIP Protocol to use any port available. However, if you wish to restrict SIP (outgoing) traffic to a specific port you can enter the port number here.
Check the Send keep alives option to send SIP keep-alive to the server.
Check the Enable QoS to enable the Quality of Service feature. QoS is a set of technologies that work on a network to guarantee its ability to dependably run high-priority applications and traffic under limited network capacity (must be supported by the user network).
Emergency Location - Ray Baum’s act
Ray Baum’s Act requires that first responders have the necessary information needed to pinpoint the “dispatchable location”, and quickly reach a 911/112 caller regardless of the device they dial from or their exact location inside a large building.
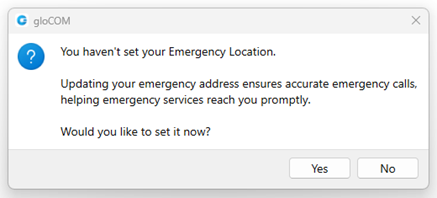
For VoIP trunk testing purposes, please use the number 933.
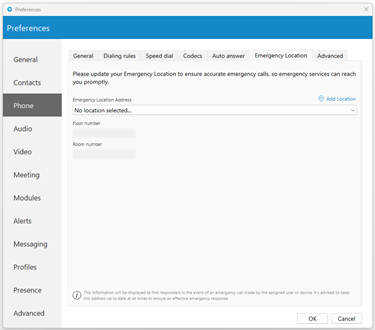
Regarding the above, the Emergency Location feature will only be available when the server locality is set to the United States.
If a user's Emergency Location is not set within the app, a pop-up message will appear on login asking them to set their location.
Also, the location can be set by navigating to the Preferences -> Phone -> Emergency Location tab, where the user can set their Emergency Location Address, Floor number, and Room number or add a new location.
Emergency Location will be displayed within the Phone window after entering the 911/112/933 number, with the possibility to change or set it.
Users should always keep their Emergency Location up to date to ensure an accurate location is provided to the emergency call dispatcher.
Also, it will be displayed within the Call window.
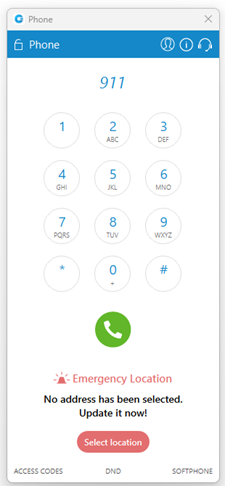
Emergency Location - Ray Baum’s act is not supported in the Office Edition.
Audio
You can set input, output, and ringtone devices, or test your devices. To test your microphone, say something on it and watch the changes in the microphone progress bar. For testing your speaker or ringing device, press the Test button to hear a sound on the selected device.
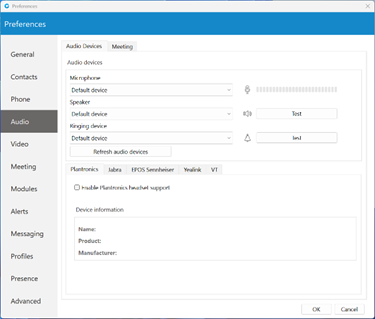
Check the Enable Plantronics headset support option to integrate a Plantronics headset with gloCOM. This will enable the use of Plantronics headset buttons such as answer, hold, etc.
The Plantronics integration requires the Plantronics Hub Software to be installed and running for it to work properly.
The same applies for Jabra and EPOS Sennheiser headsets. Turn on the Enable Jabra headset support option, in order to integrate a Jabra headset with gloCOM. Turn on the Enable EPOS Sennheiser headset support option, in order to integrate an EPOS Sennheiser headset with gloCOM.
Check the Enable Yealink headset integration option to integrate a Yealink headset with gloCOM. It will enable Yealink headset buttons such as answer, hold, etc...
Check the Enable VT headset integration option to integrate a VT headset with gloCOM. It will enable VT headset buttons for answering, holding, etc.
Changing audio devices and softphone integrations are not supported in the Office Edition.
Video
Video Settings section is divided into 5 tabs. Inside the Quality tab, you can set the resolution of the video call. You should adjust these settings based on the quality of your network connection.
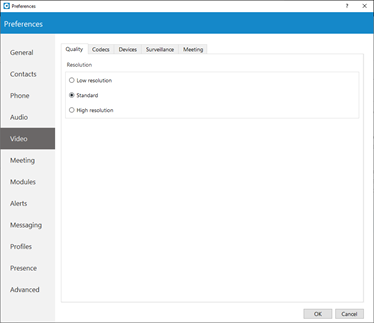
For example: If your bandwidth is low or you are experiencing temporary network issues, you can set the video quality to Low resolution to get better video call performance. Inside the Codecs tab, you can enable or disable video codecs, and if you have more than one codec you can sort them by priority using the up and down arrows on the right.
Under Advanced codecs settings, you can adjust how much compression the codecs will use. The higher the bitrate the less compression codecs will use, which directly relates to better video quality but also larger files. Use default values for codecs if you are not familiar with video codecs.
Inside the Devices tab, you can select the video capture device. e.g., if you have a laptop with an integrated web camera, and you connect another web camera to your laptop, you can specify which camera gloCOM will use for video the call from a drop-down menu. Next, inside the surveillance camera tab, you can enable or disable the surveillance camera and choose if the surveillance camera video should always stay on top even if another window is selected. Under the URL field, enter the URL of your IP surveillance camera stream.
Please be aware that only MJEPG stream over HTTP is supported at the moment.
Meeting
The meeting settings section is divided into two tabs: General and Recording.
General
Under the General tab, the user can find the following options:
- Maximize Meeting window when a participant shares their screen.
- Scale shared screen to fit in the window.
- Show meeting join link message in chat if meeting is started from chat window.
- Show reactions.
- Play sound notification on raise hand.
- Remind to record on meeting join.
- Show scheduled meeting notification.
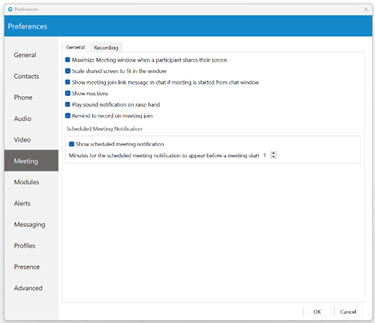
Recording
Under the Recording tab, the user can find the following options:
- Save recordings to.
- Draw duration timestamp on video in the corner.
- Delete temporary files after converting them to video.
- Automatically convert recordings after meeting is ended.
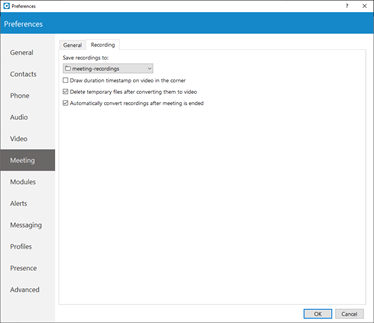
Modules
Modules section is divided into six tabs: Settings, CRM, Call Popup, Skype, Browser click to dial, and Fax.
Settings
Users can set options for the Screen Pop feature related to the Agent and Supervisor editions in this tab.
CRM
gloCOM is compatible with several Customer Relationship Management solutions, such as Salesforce, SugarCRM, Zoho, Microsoft Dynamics, Bullhorn, Zendesk, Pipedrive and Hubspot.
To enable CRM integration with gloCOM, click on the Settings icon, navigate to the CRM section and check the box next to Enable CRM integration.

Under the Popup Options the users can set:
- When a page with customer information should open (This can be set to open when answering the call, or immediately when the phone starts ringing before even answering, and not to open at all for Incoming calls).
- For Outbound calls, the users can set it to pop up when the call is initiated or when the call is answered, and same as with Incoming calls this can be disabled by selecting the option Never.
Under the Authentication, users can enter account details for CRM. Each CRM is different and requires from the user to enter a security token, password, or a combination of both.
Under the Logging options, users can specify which information they want to log. Also, users can choose to log information that their admin has set by selecting the Use the settings from the server option.
Call Popup
Call Popup module can be used to push the call details to the browser or third-party software.
It is possible to do a Call popup based on the URL, and this can be set per Queue and ERG. This can be done only if the option "Enable Queue/ERG URL Popup. If enabled, application will use URL configured on server." is checked. (Preferences --> Modules --> Call Popup).
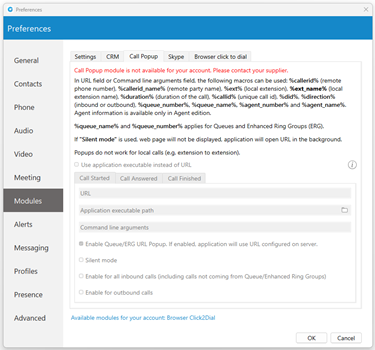
Users can set the Call popup to open when the call has started/answered or when the call has finished. For each setting, the user can specify to enable it for Inbound and/or Outbound calls, and turn it on Silent mode. In the Silent mode, a URL request will silently be sent to the server, meaning it will not open a web browser.
Call popup is macro-based. In the URL field the following macros can be used: callerid, callerid_name, ext, ext_name, duration, callid, did, direction, queue_number, queue_name, agent_number and agent_name.
(e.g., In Call started URL field the user may enter yourcrm.com/calls?id=�llerid% and check the Inbound calls below. Now, whenever the user receives a call from a customer Call popup will open a web browser and will write the customer’s phone number.).
All this information can be sent silently to the user's CRM server and create reports such as how many inbound calls the user has received, how many outbound calls the user has made, average call duration, etc.
Specify EXE file, APP in MacOS, or URL that will be executed in Call Popup module.
Skype
The click-to-dial plugin allows users to make regular or conference calls from Skype for Business through their deskphone or gloCOM softphone.
Browser click to dial
A browser click-to-dial extension allows users to dial any telephone number on a web page by clicking on the number. Once the extension is downloaded, some browsers require manual installation.
Fax
Users can predefine the custom message per Caller ID to avoid typing an optional message for each fax for a particular Caller ID within the Send Fax dialog.
Alerts
To start click on the Settings icon inside the toolbar and navigate to the Alerts section. Check the bring application to front when I receive a call option to bring gloCOM to the front whenever someone calls you. You might not want to have your work interrupted by call alerts, in that case, you can uncheck this option. You will still be able to receive the calls, however, you will have to navigate to the application yourself.
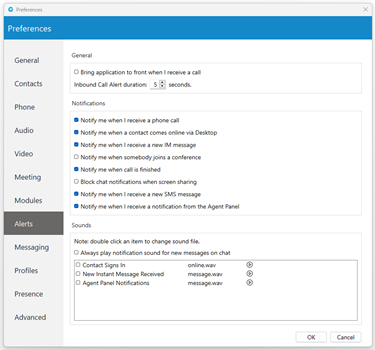
If you want the Agent panel to pop up when you receive a call please navigate to the Alerts section in Preferences and check the option Bring application to front when I receive a call.
Inbound Call Alert duration can be set between 5 and 15 seconds. This option controls the duration of a small notification window that pops up in a lower right corner of the screen whenever you receive a call.
To turn off the inbound call alert completely, simply uncheck the Notify me when I receive a phone call option. You can also set to receive notifications when a contact comes online, when you receive a new message, when somebody joins a conference, when a call is finished, and etc. Only the duration of the call alert notification can be adjusted, all other notifications have a fixed duration of 5 seconds.
Under the Sounds section, you can choose to turn sound notifications on or off for contact sign-in and or for new chat messages. If you select Always play notification sound for new messages, you will hear a sound notification for every message received, even if you have a chat window currently open. For this feature to work the New instant message received option has to be selected as well, otherwise, you will hear no sound.
To preview a sound, click on the play button on the right, and if you wish to change a sound, double-click an item and select the sound file you wish to use. Please note that only .wav files are supported.
Messaging
Click on the drop-down menu below the Save received files to and select Other to specify the location where gloCOM will save received files. Under the Change font menu, the user can choose the default font for the chat layout.

The Auto-download chat media files smaller than 500 KB option allows the user to enable/disable auto-download for media files smaller than 500 KB within the chat conversations. By default, this option is enabled. (Does not apply to SMS conversations.)
Changes in this section will apply to both Chat and SMS messages.
Profiles
To enable profiles click on the Enable multiple login profiles mode. With this option enabled you can add, edit or remove an existing profile.
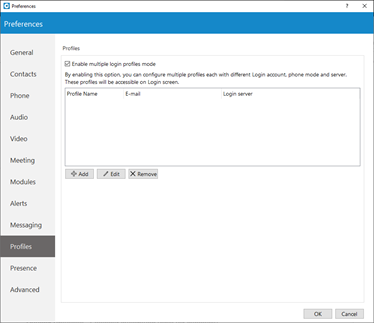
To add a profile click the Add button, follow the setup wizard, enter the profile name, enter your gloCOM email and password, and under the Advanced tab enter the server address, and if needed specify the SIP proxy as well. When done click Next to continue.
Adjust the phone settings to your preference and click Next, review your information once more, and click Finish to create a profile. Once created you can edit the profile by selecting it from the list, and clicking the Edit button or you can remove the selected profile by clicking the Remove button.
To log in with your newly created profile on the gloCOM login screen, from a profile drop-down menu select your profile and click on the Login button.
Presence
Busylight
Busylight integration allows users to use their Busylight devices as a part of the gloCOM Desktop application. This way, they can inform colleagues about their current presence status.
To start using Busylight integration, click on the Settings icon placed on the right side of the main window just above the blue bar, navigate to the Busylight section, and check the Enable Busylight integration option. On the right side of the window, the user can see the status message, which gives them information on whether their device is connected or not.
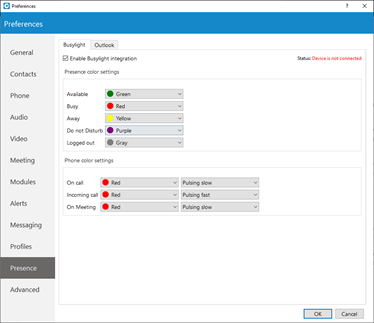
Furthermore, users can change the Presence status color for each status per their wish. By default, these colors match the Presence status colors within the gloCOM app, and we do not recommend changing them. Additionally, users can change Phone status color and pulse rate as well.
Outlook Presence - Calendar integration (only for Windows)
Outlook presence integration works only for Windows. To enable Outlook integration with the gloCOM Desktop application, please, navigate to the Preference --> Presence --> Outlook and check the Enable Presence - Outlook Calendar Integration option, which is disabled by default.
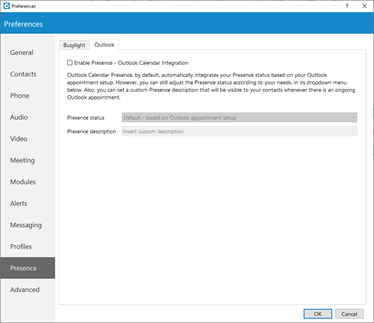
Outlook Calendar Presence, by default, automatically integrates users' Presence status based on their Outlook appointment setup. However, the user can still adjust their Presence status according to their needs. Also, they can set a custom Presence description that will be visible to their contacts whenever there is an ongoing Outlook appointment.
Advanced
In the Advanced menu you can change the Polycom listening port to suit requirements of your Polycom phone.
The default port is set to 10983 which can be changed by clicking inside the box and entering your listening port number.